Webhook integration in Explodely allows you to automatically send real-time data to external applications whenever specific events occur, such as a sale, refund etc. This makes it easy to connect Explodely with CRMs, automation tools, or custom systems without manual work.
This article walks you through how to set up a webhook in Explodely.
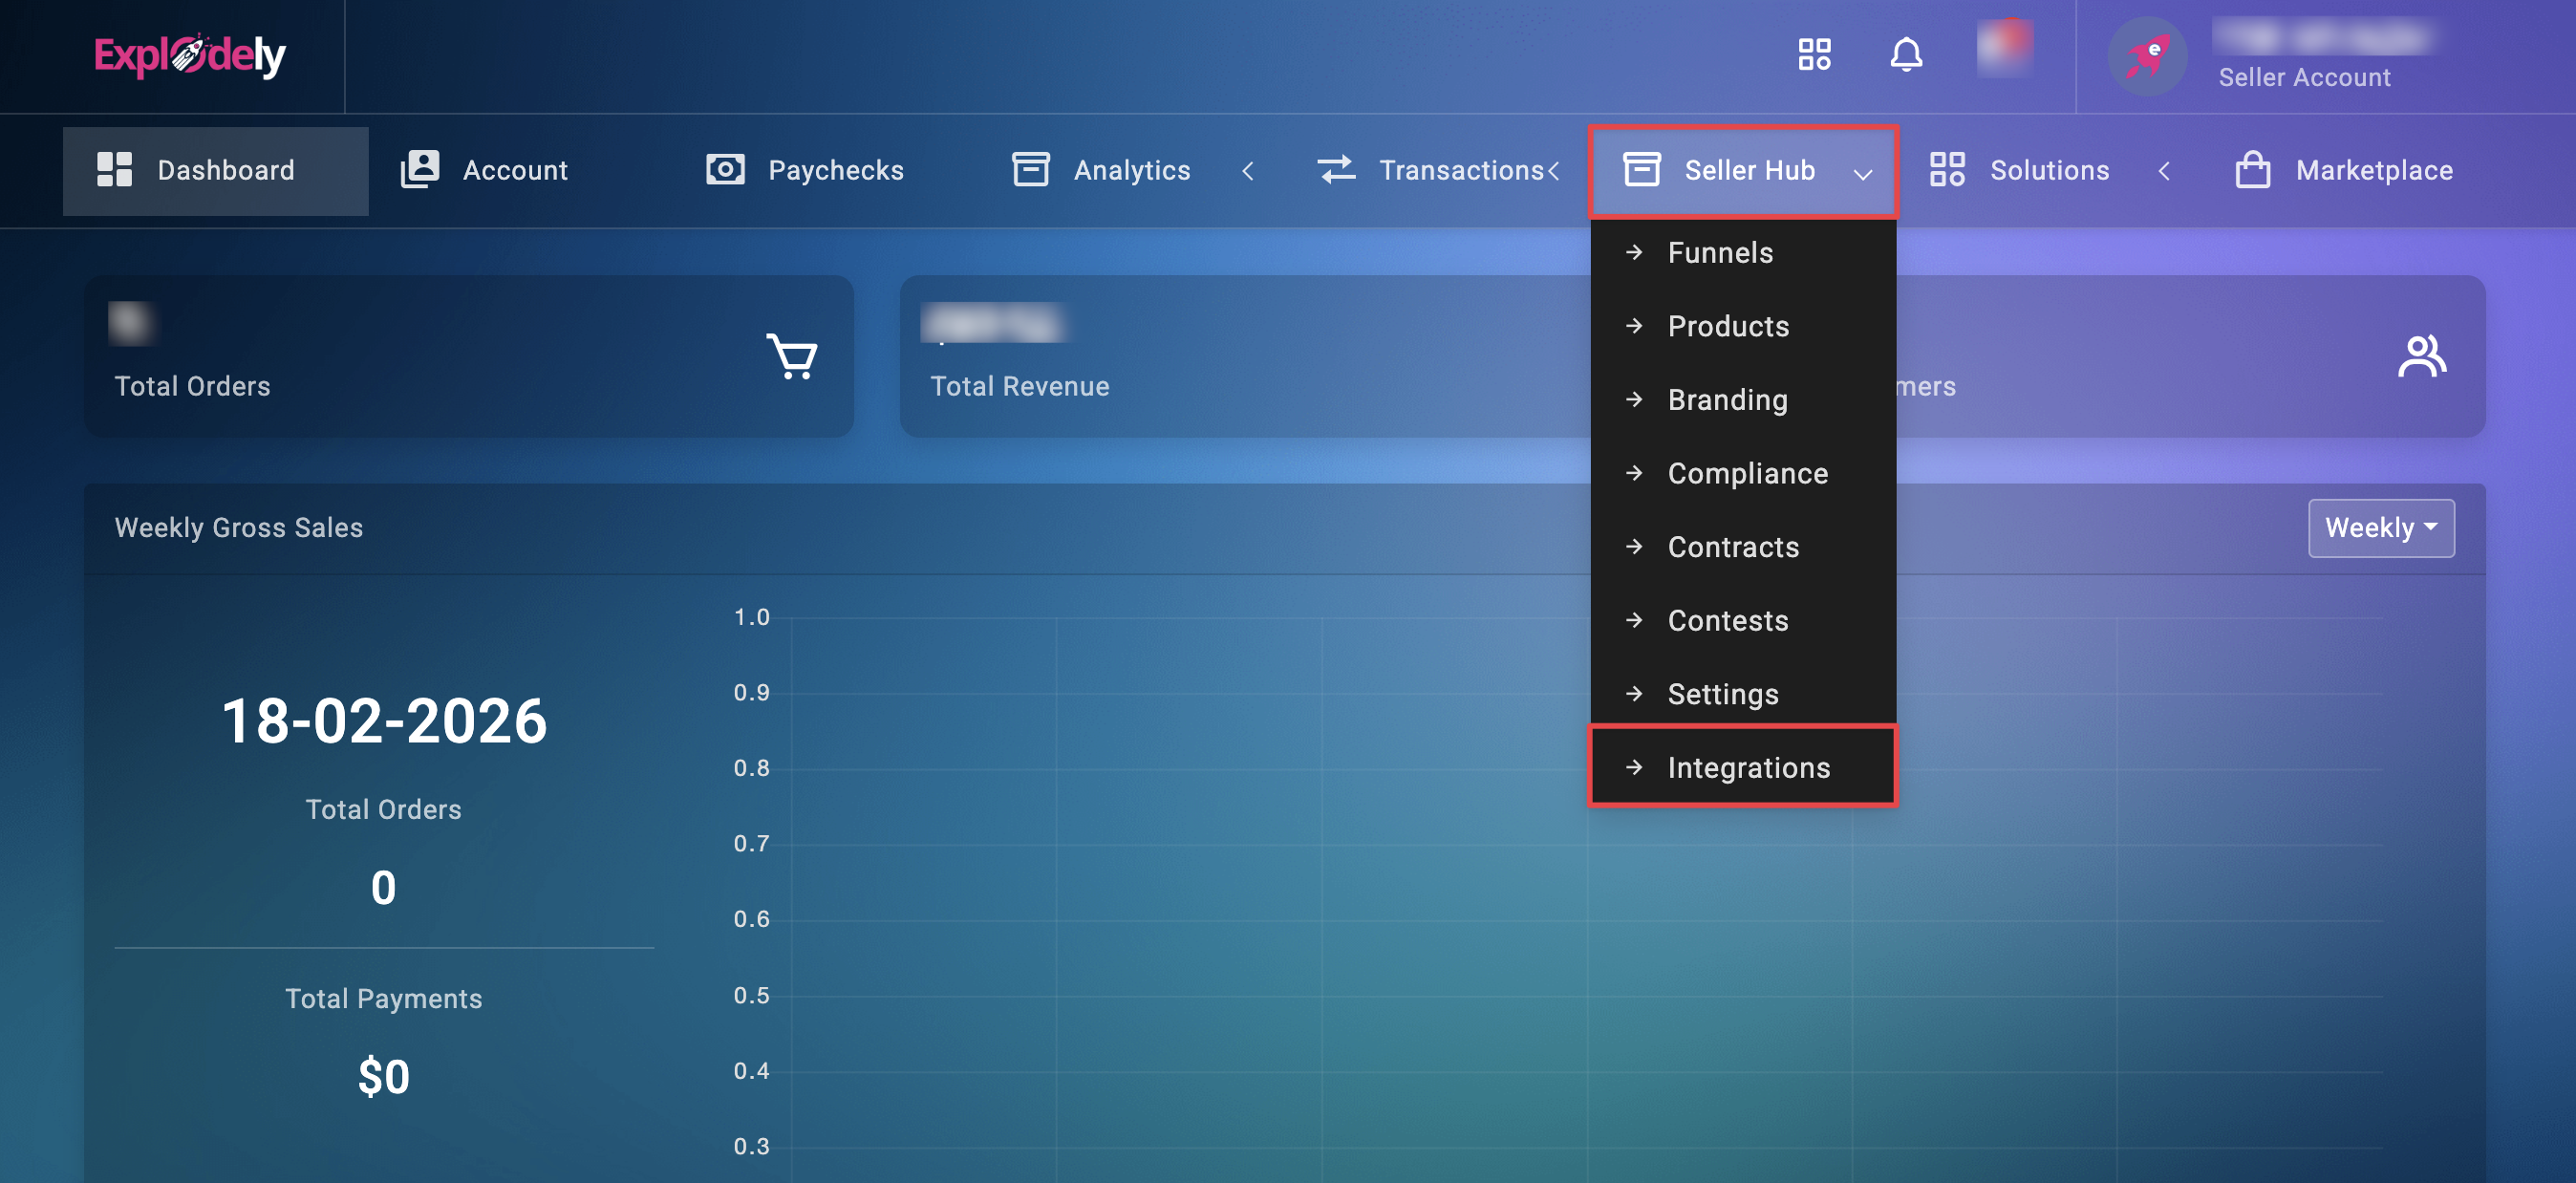
Step 1: Log in to your Explodely Seller account and navigate to Seller Hub → Integrations.
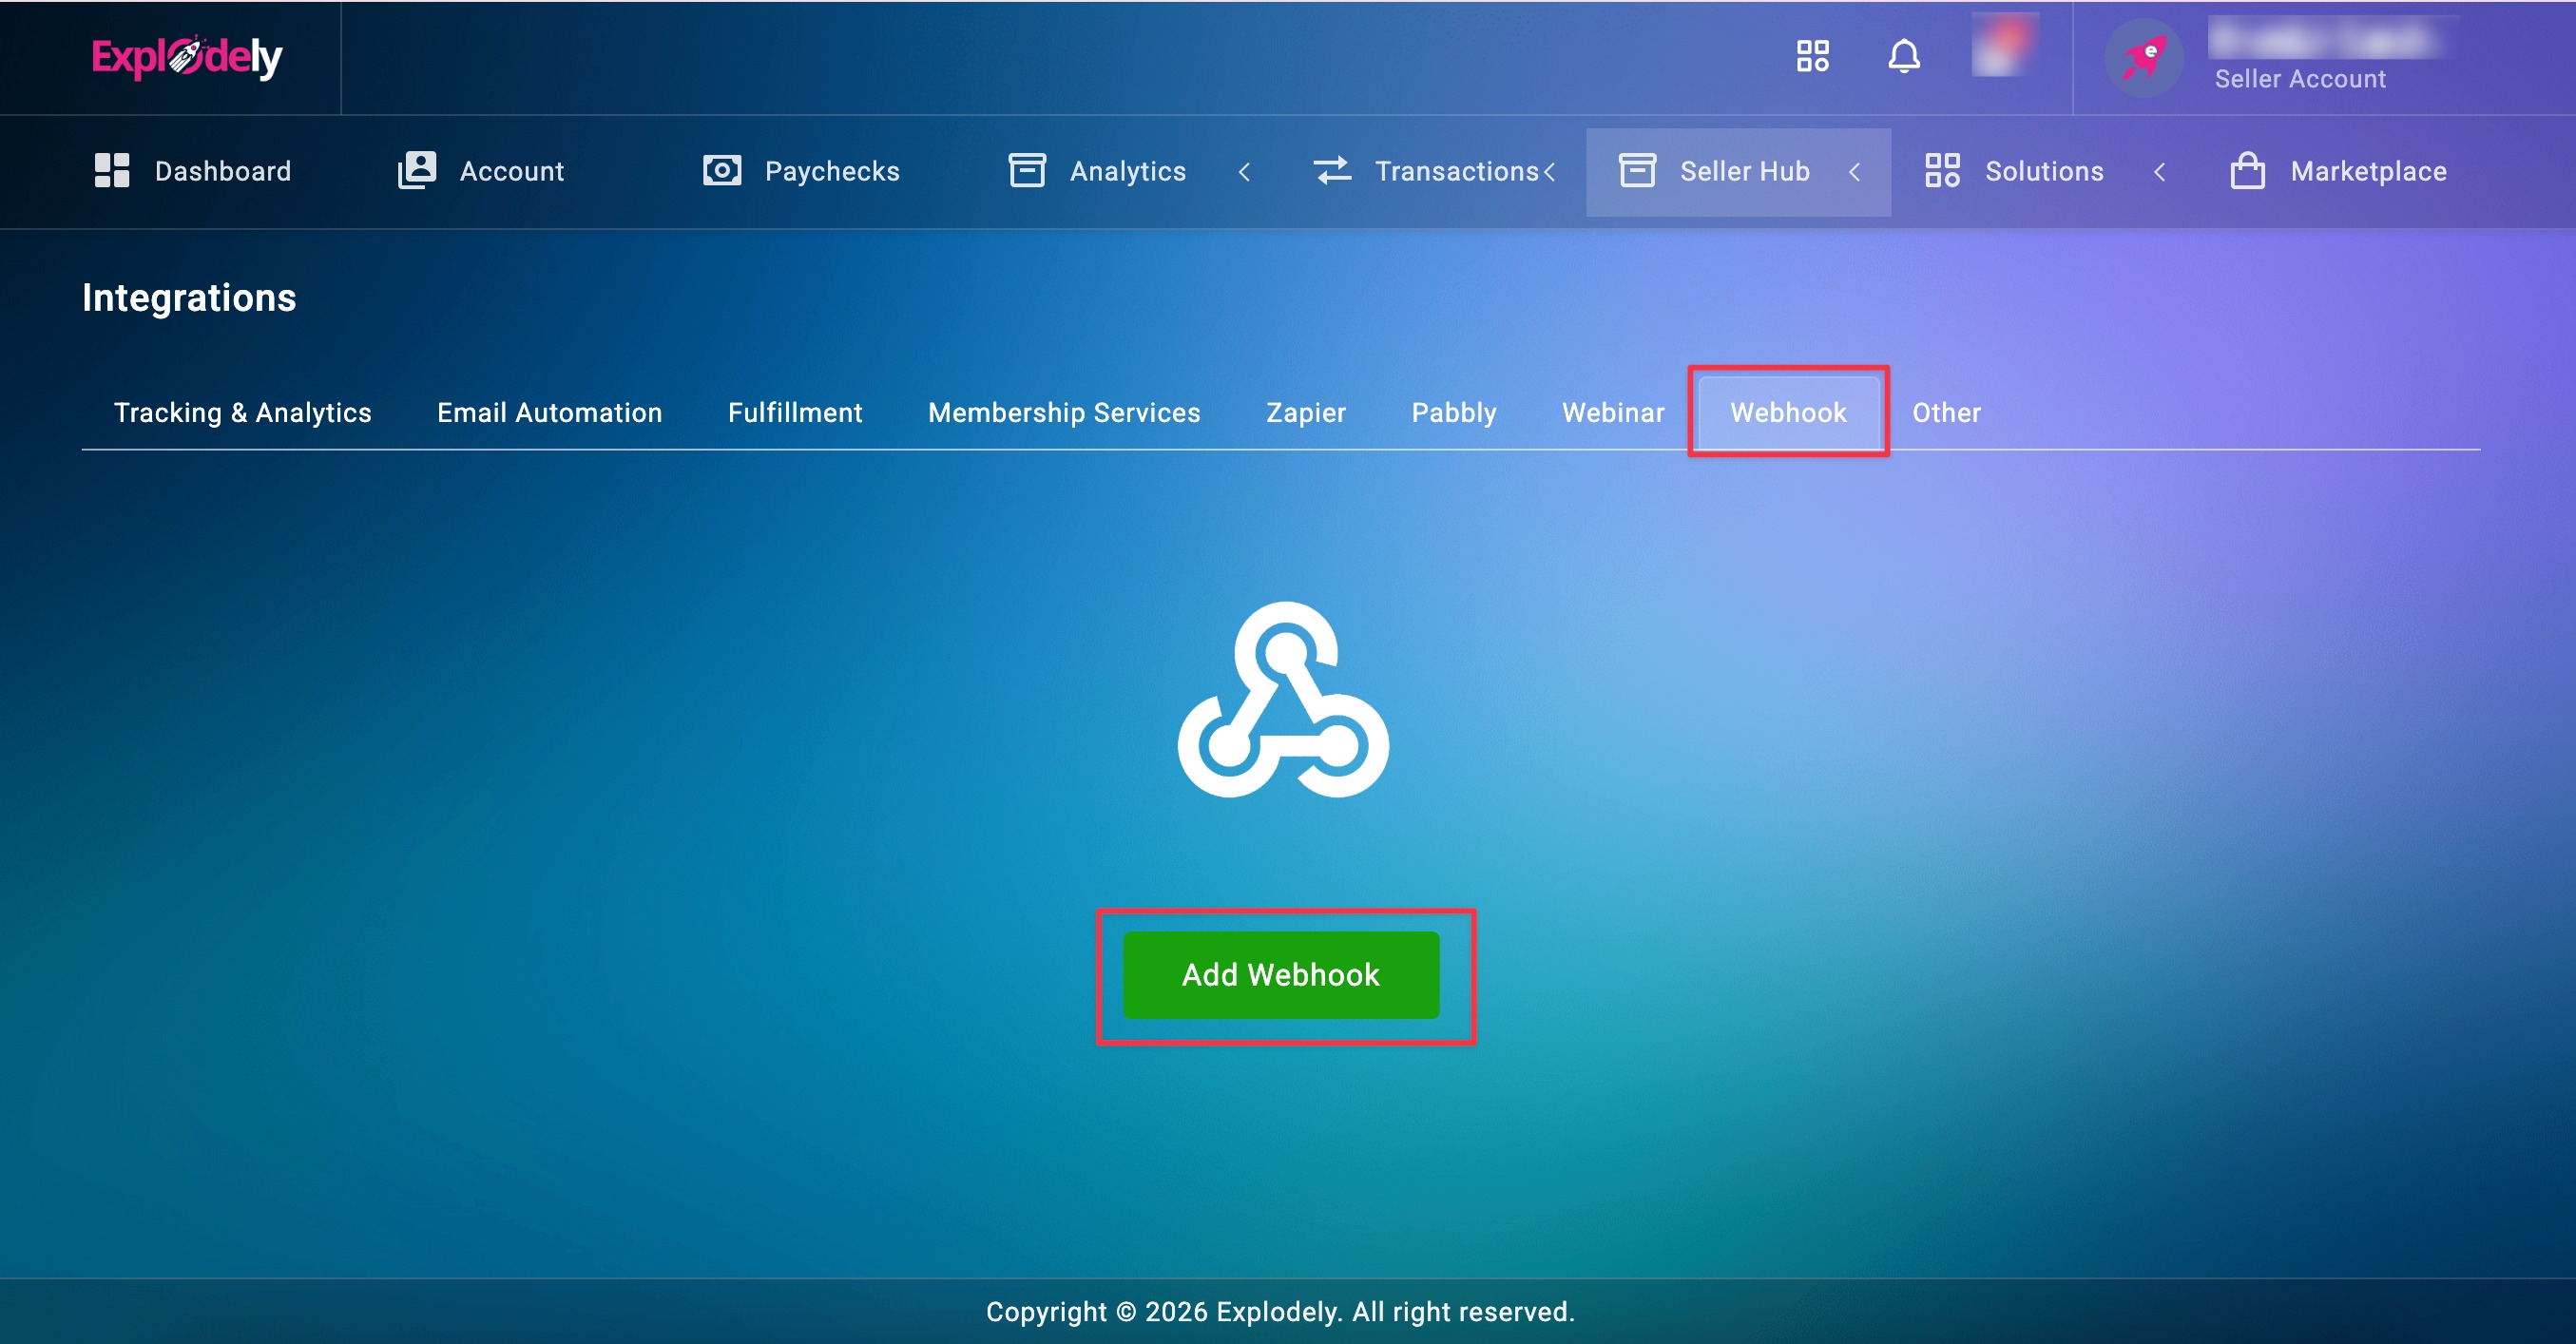
Step 2: Click on Webhooks and then click Add Webhooks to create a new webhook configuration.
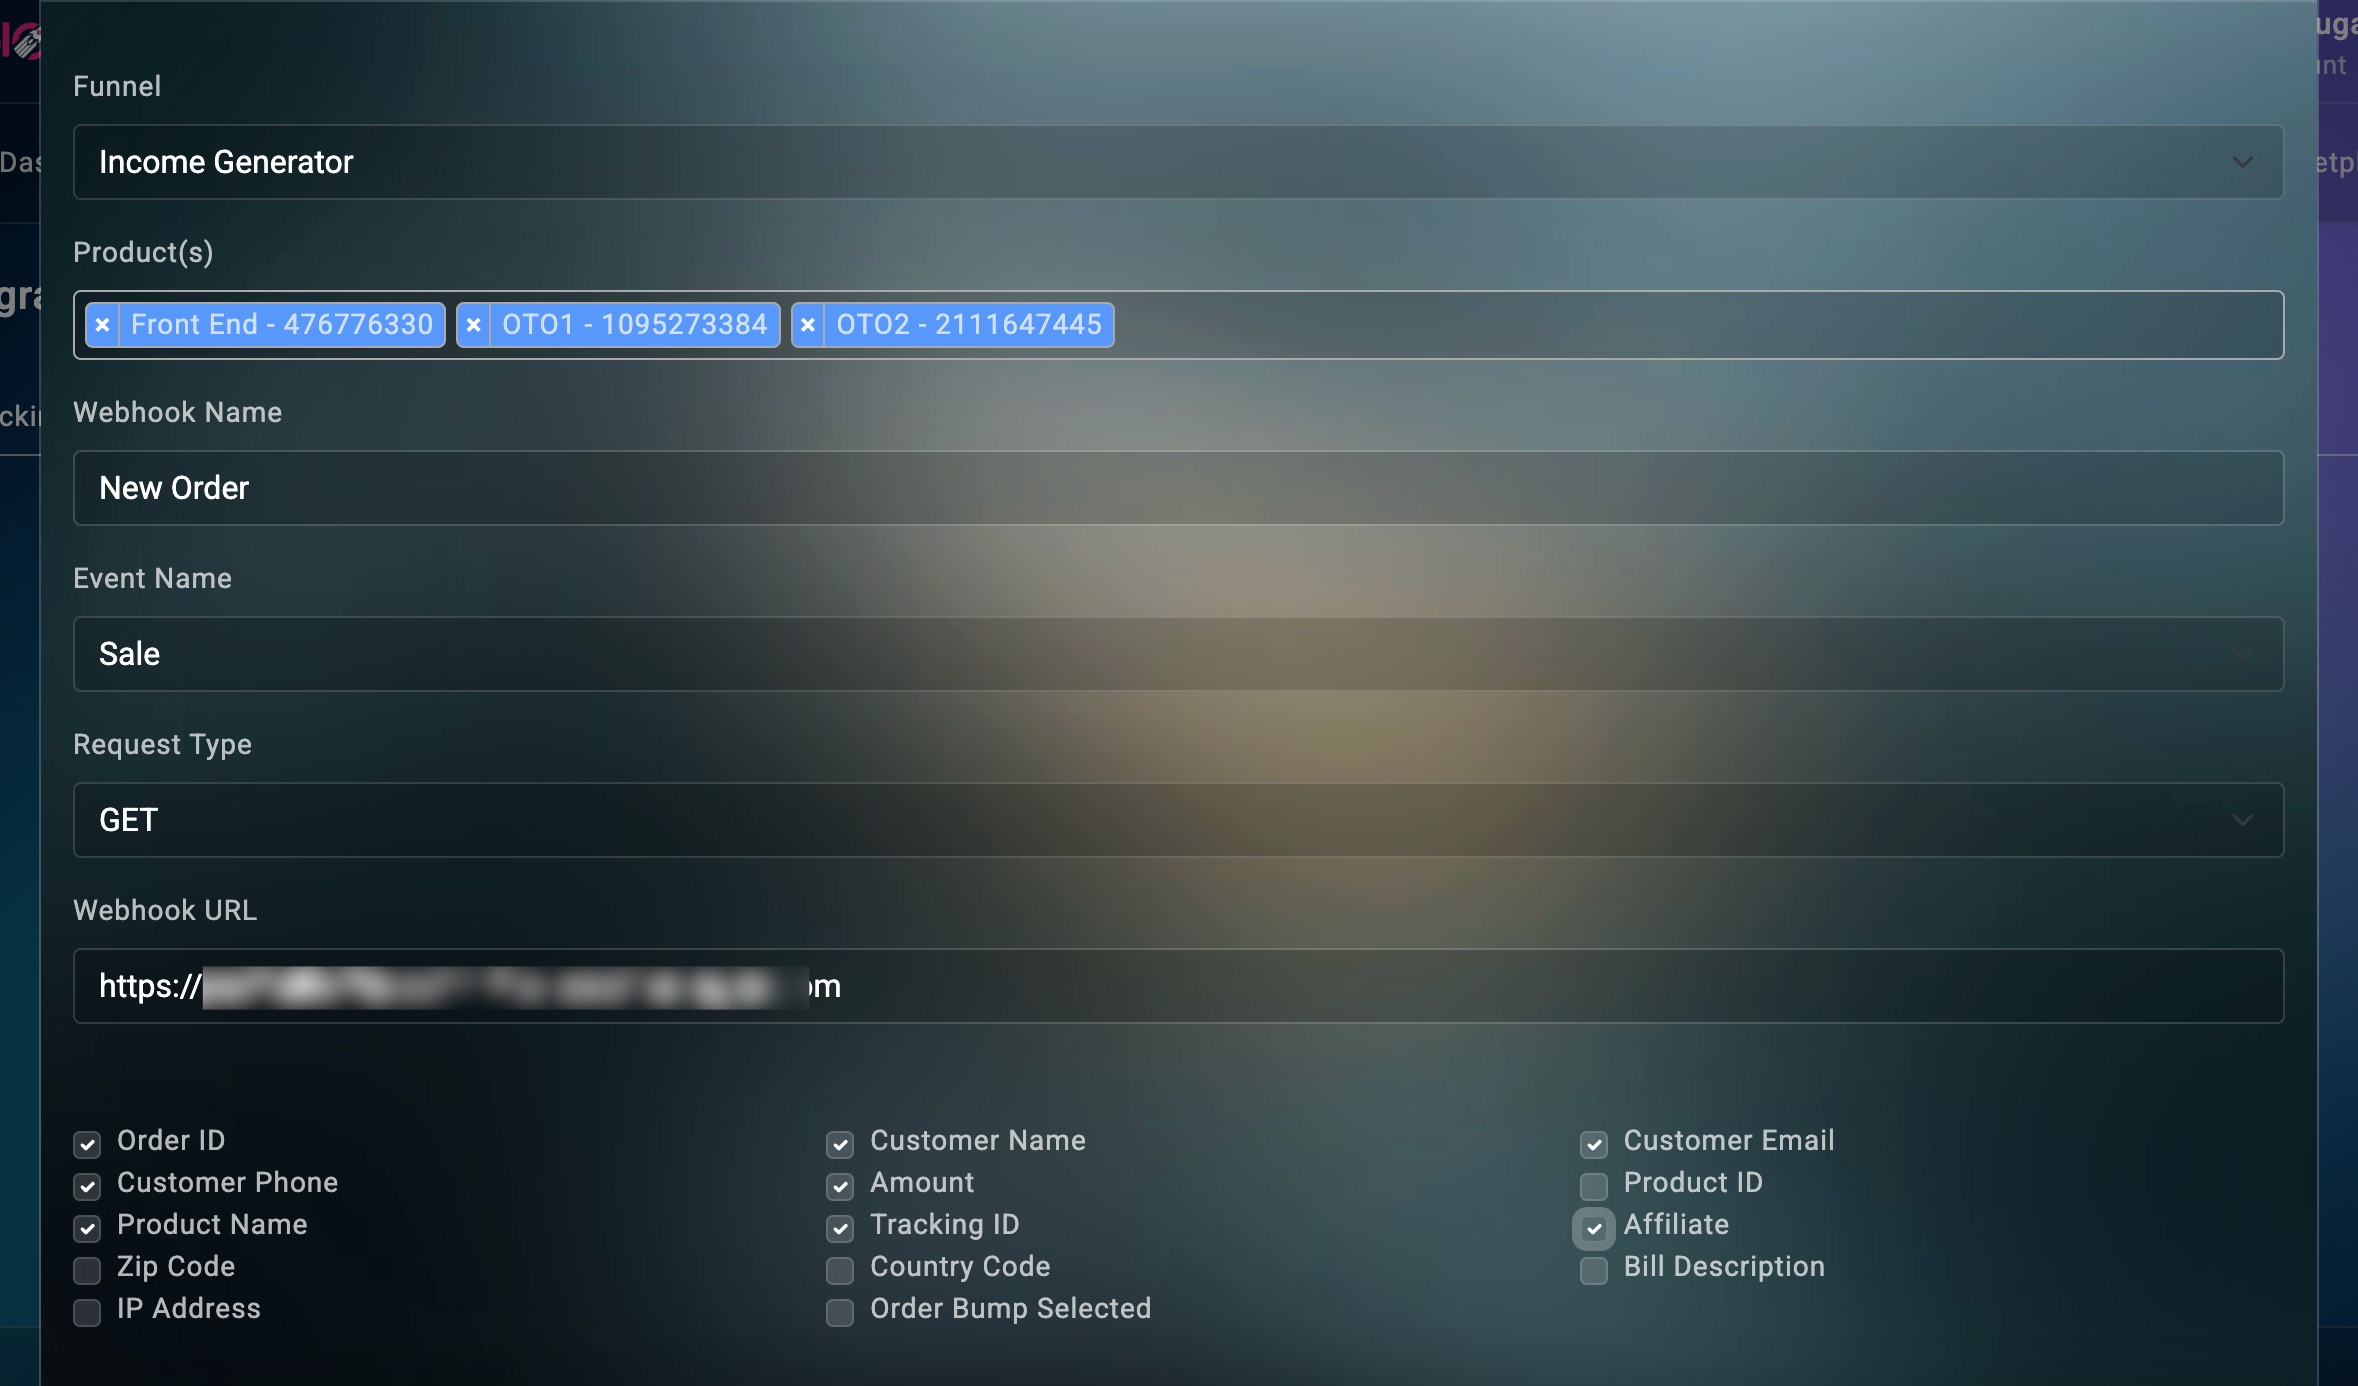
Step 3: Fill in the required details for your webhook setup like, Webhook Name, Webhook URL, Funnel and Products.
Important: Tick the checkboxes for the data fields you want to send to the webhook URL. Only the selected data will be included in the webhook payload.
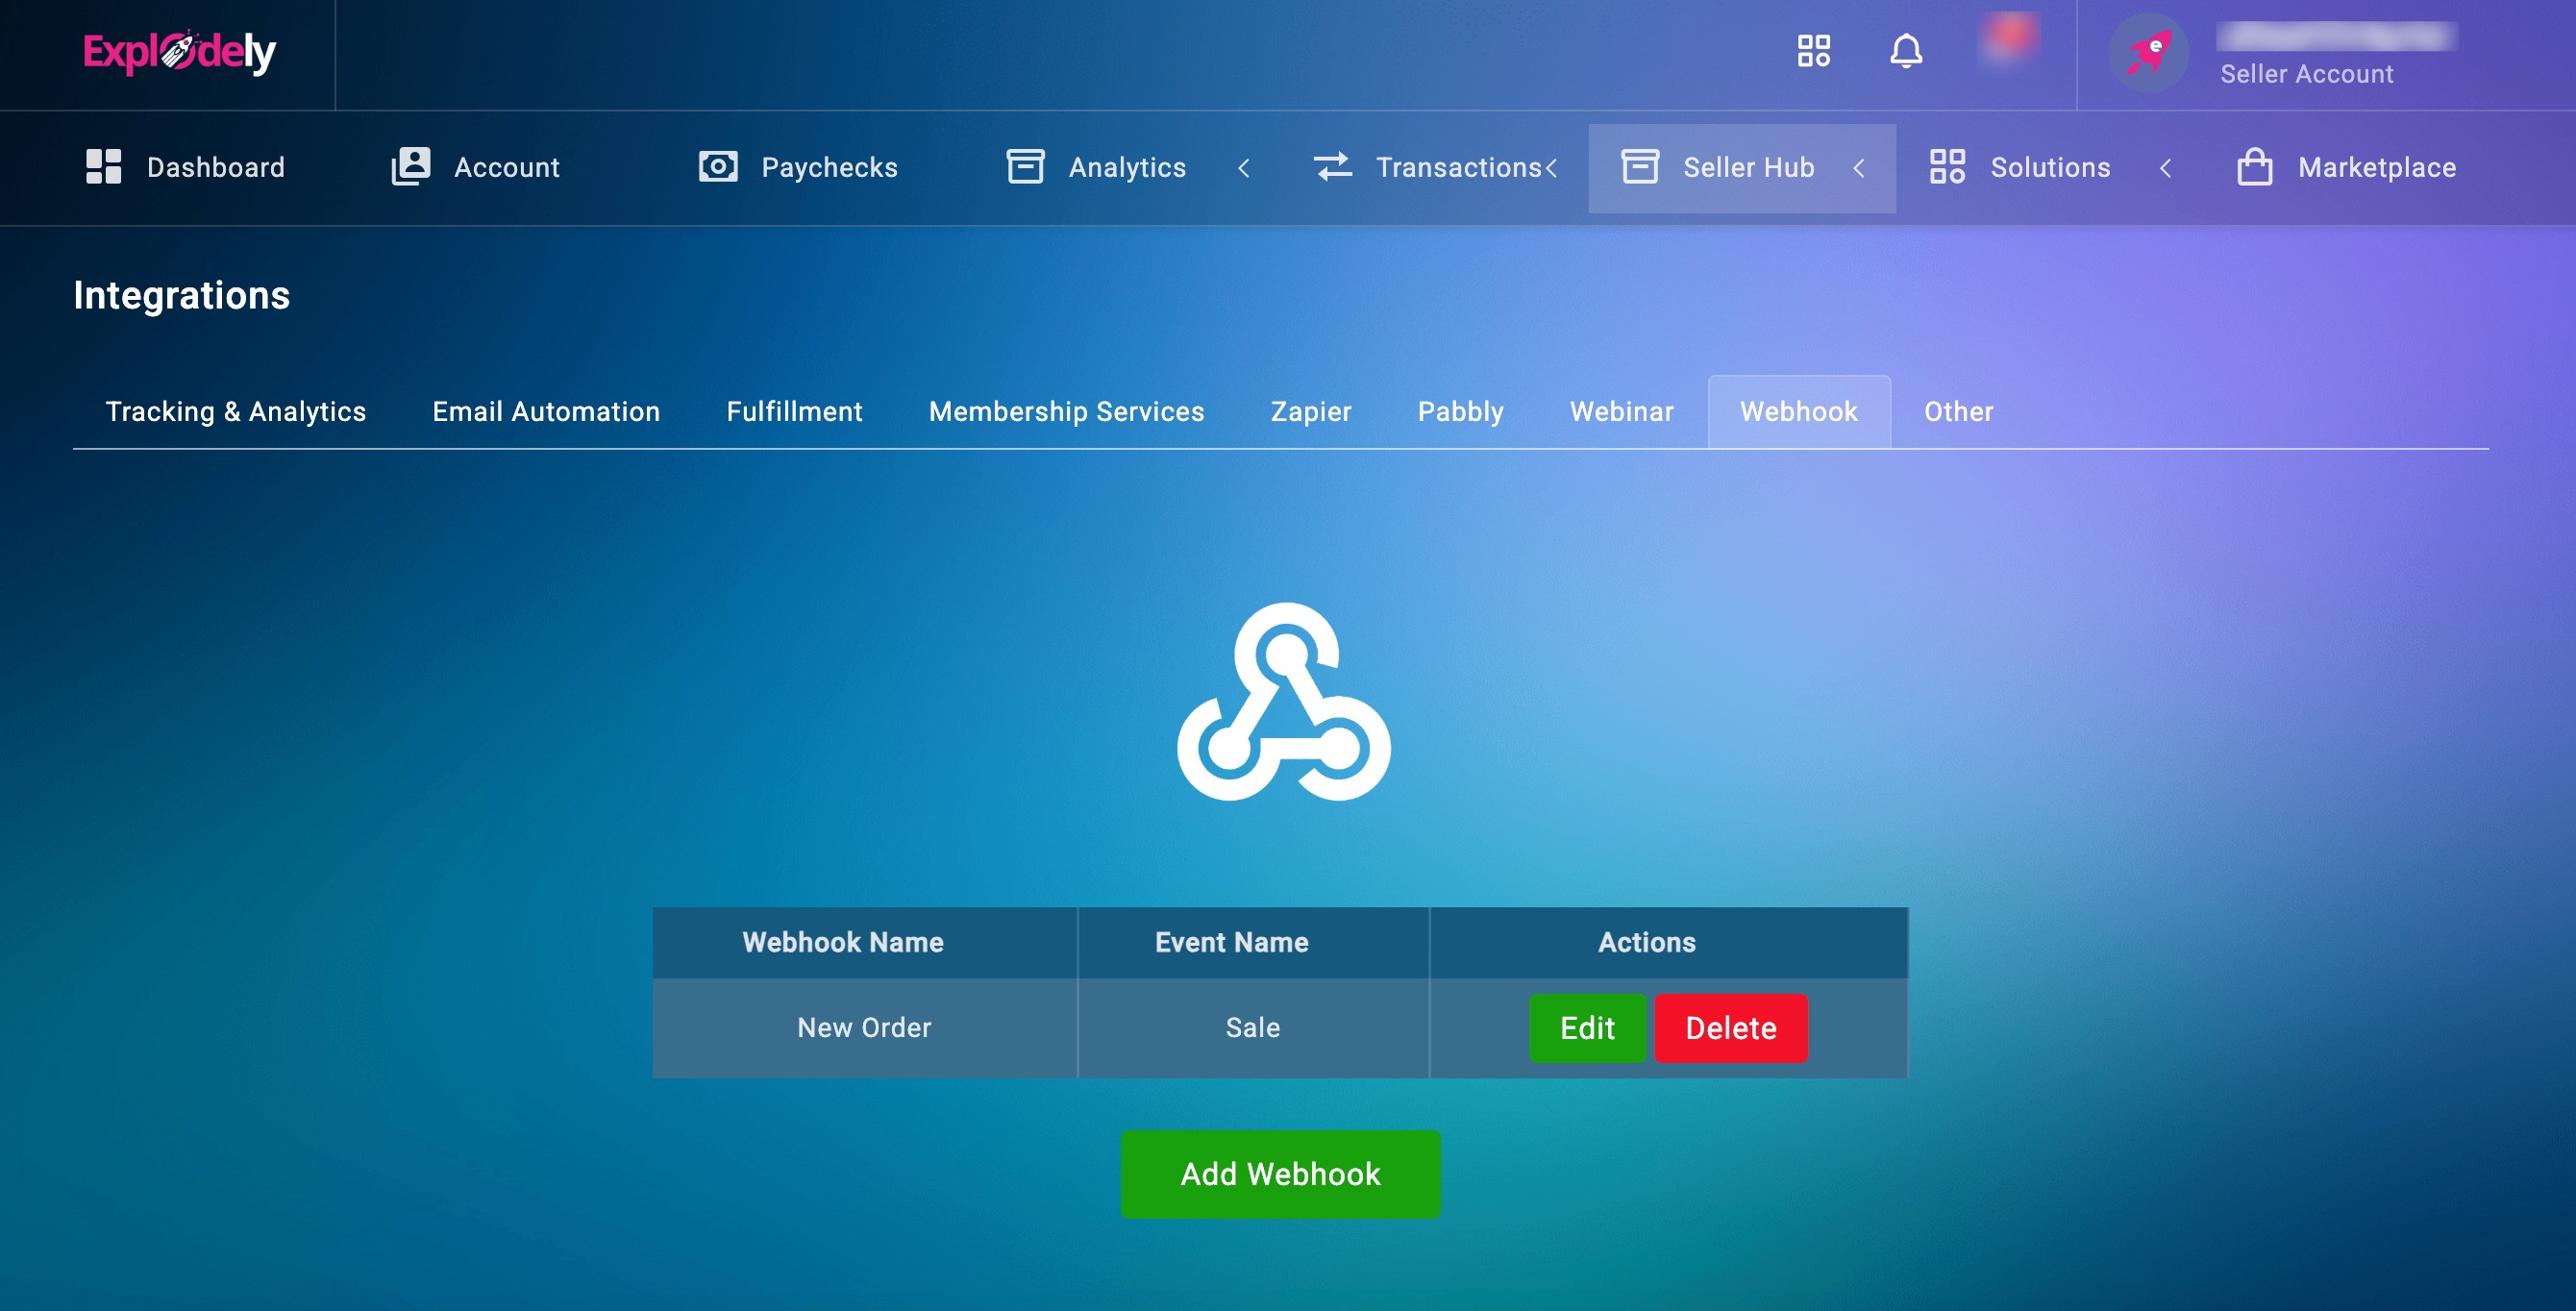
Once everything is configured, click Submit to save your webhook.
Step 4: After setting up the webhook, perform a test sale to ensure the integration is working correctly.
Here's how you can do a test sale:
Webhook integration in Explodely helps you automate data flow and connect your seller account with external tools seamlessly. Once configured and tested, your webhook will send real-time updates whenever the selected events occur and improve workflow efficiency.
If you need to make changes later, you can always edit or delete your webhook from the Integrations section.
Please contact us if you have any questions or concerns at sellers@explodely.com.