
Tracking your sales accurately is important for understanding campaign performance and optimizing your marketing efforts. By integrating UTMify with your Explodely account, you can automatically track sales and Initiate Checkouts using UTMs.
This article walks you through the complete setup process so your conversions are correctly tracked inside UTMify.
Step 1: Generate API Credentials in UTMify
i) Log in to your UTMify account.
ii) Navigate to Integrations → Webhooks.
iii) Generate your API credentials.
iv) Copy the API Key that is generated and keep it safely as you’ll need it in the next step.
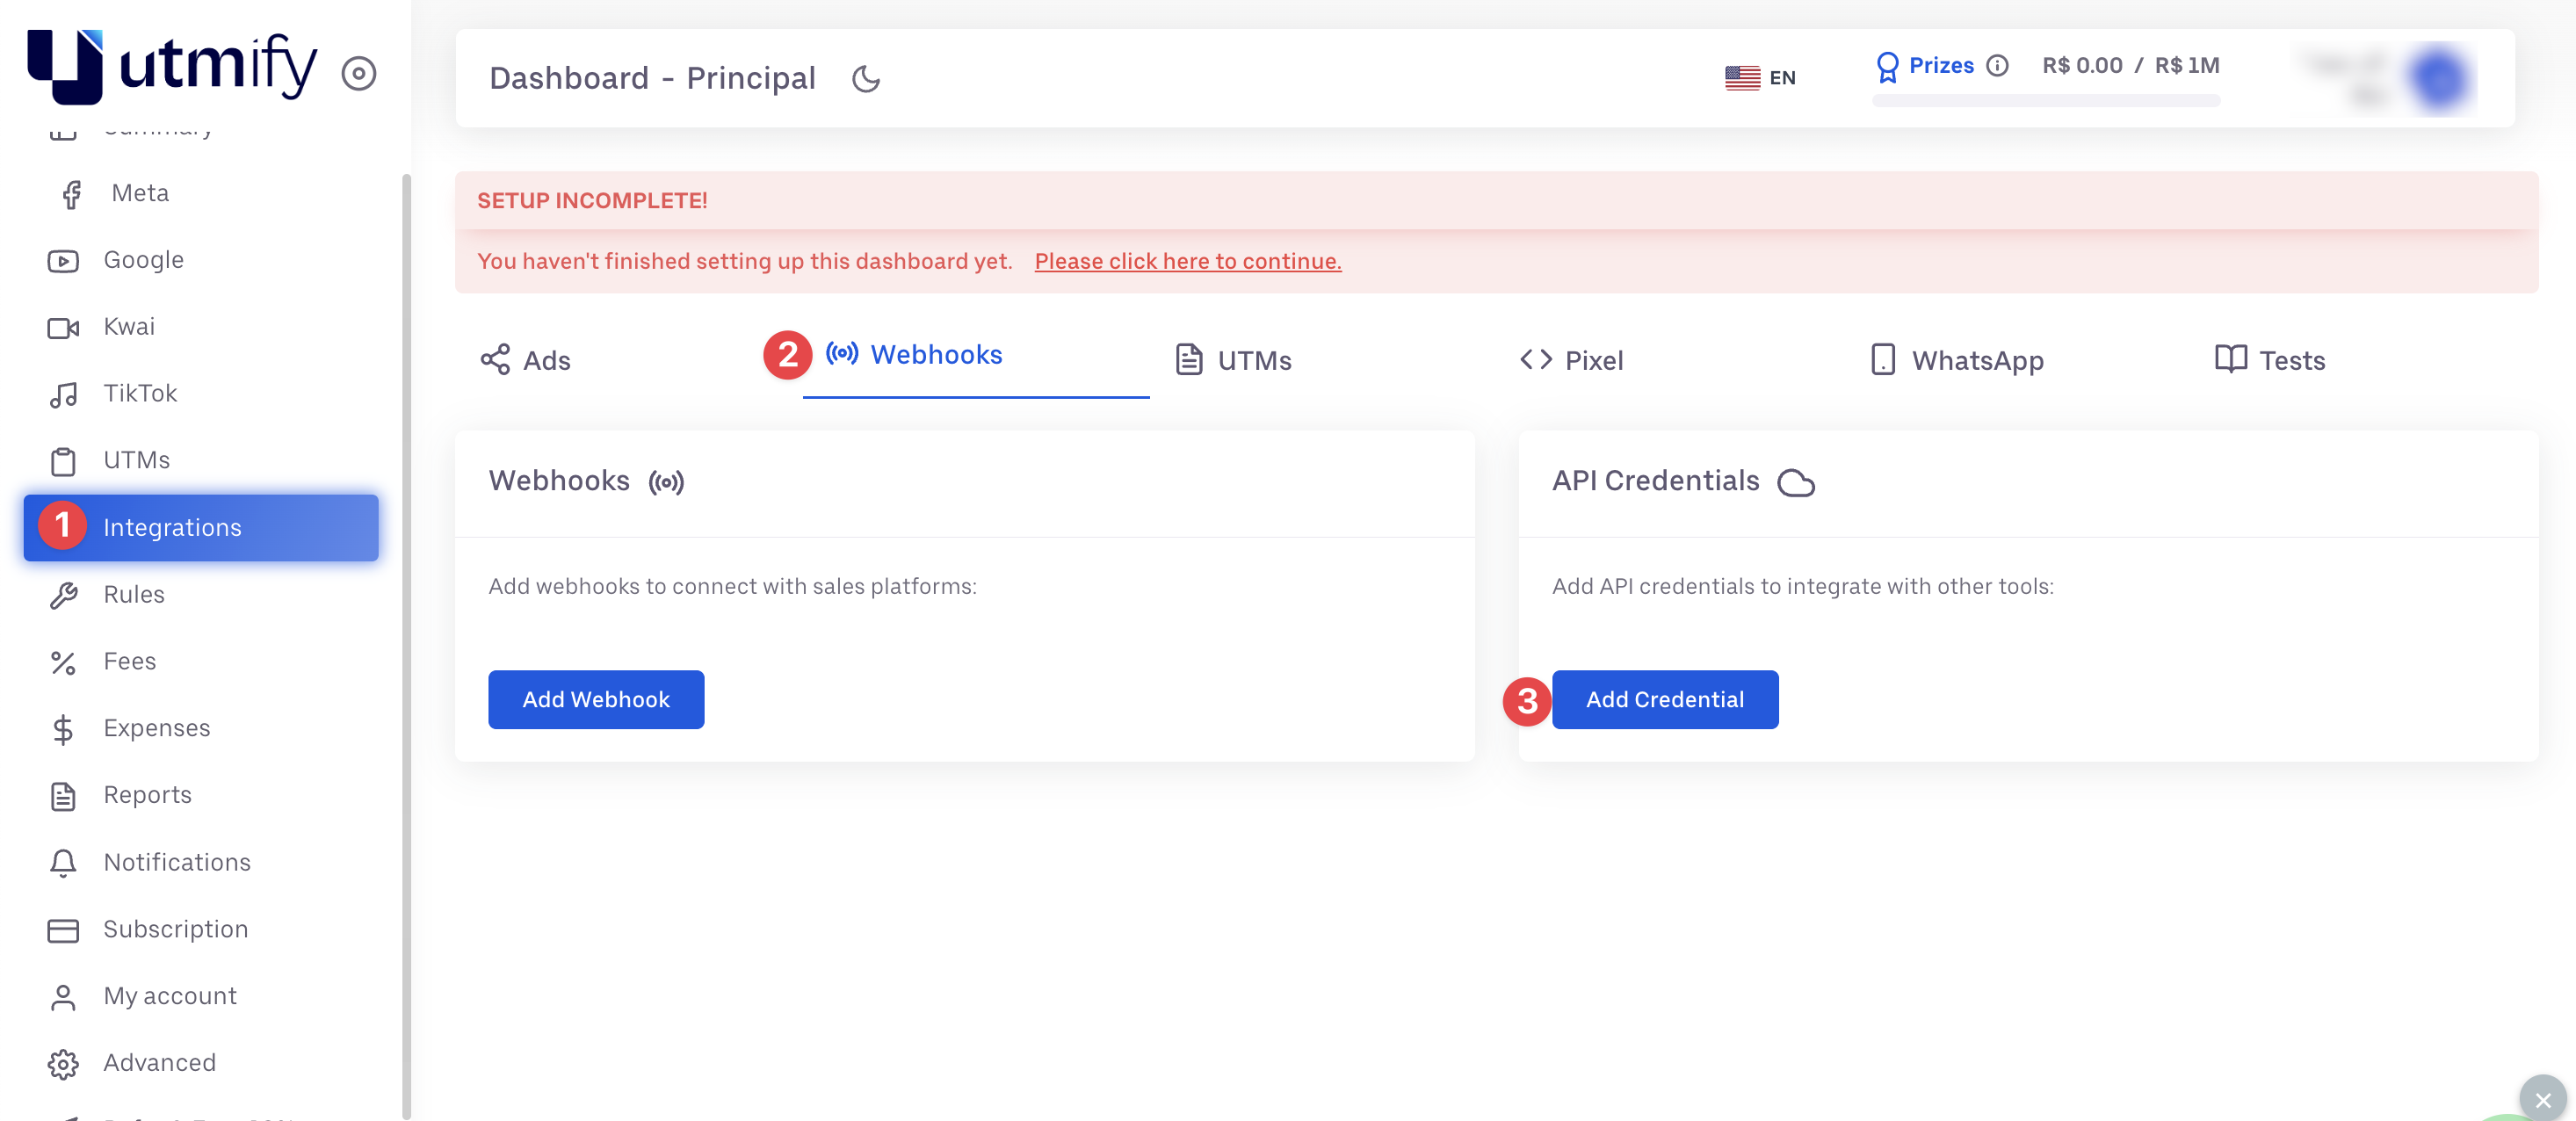
Step 2: Connect UTMify to Your Explodely Seller Account
i) Log in to your Explodely Seller account.
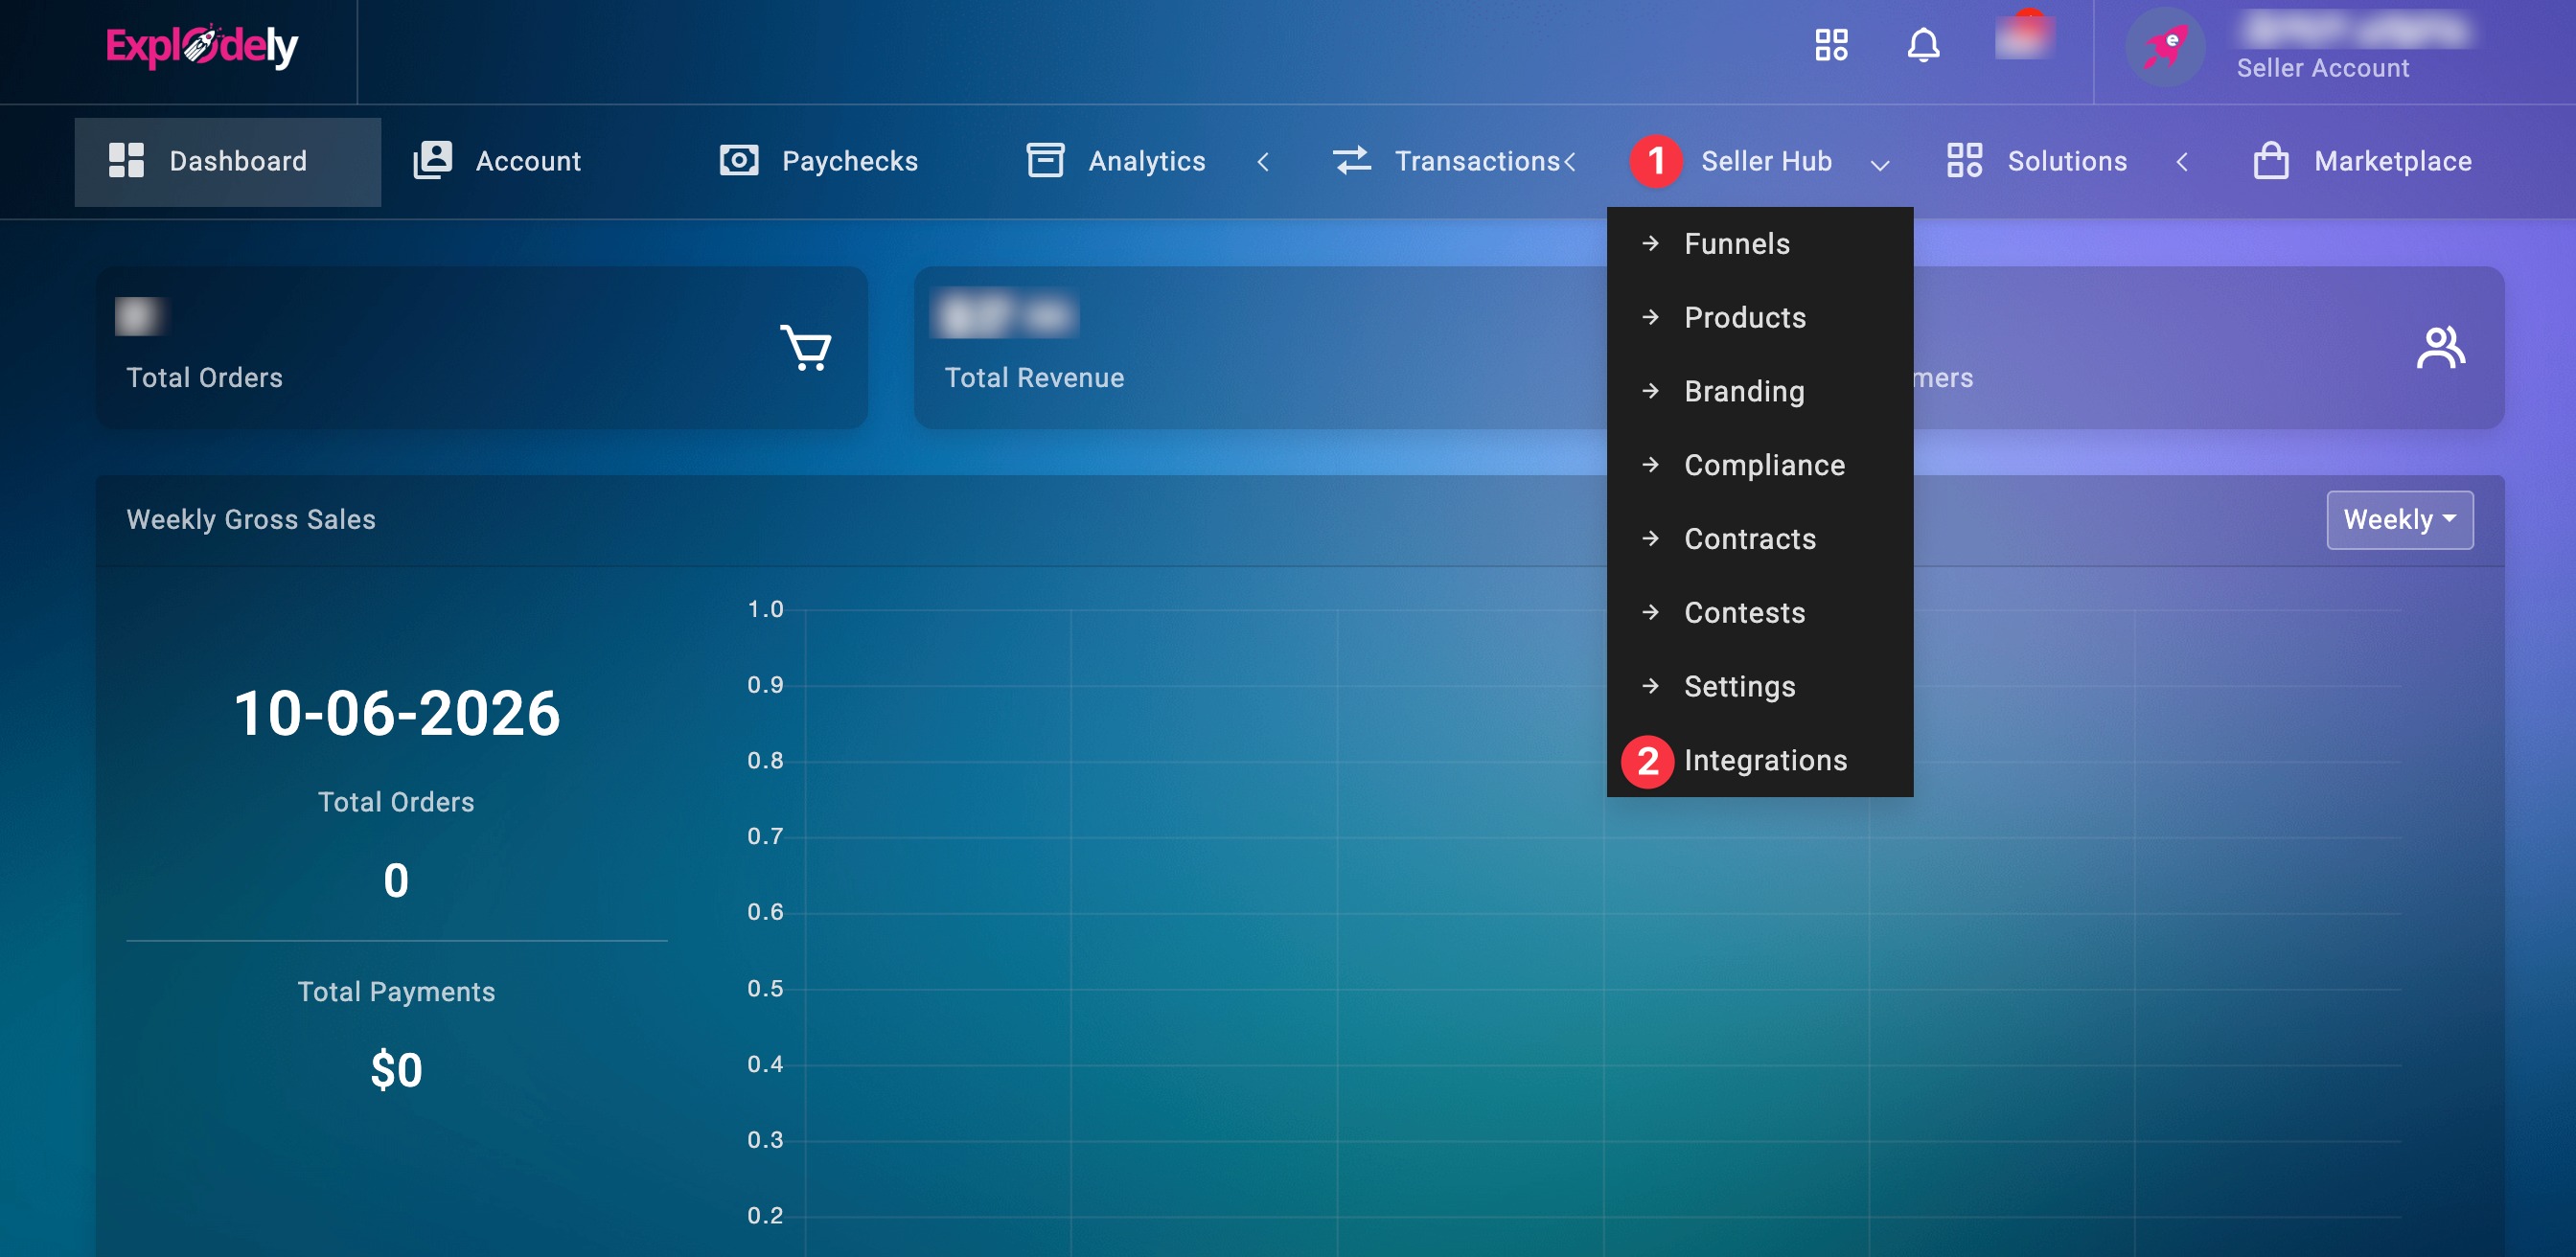
ii) Go to Seller Hub → Integrations → Tracking & Analytics.
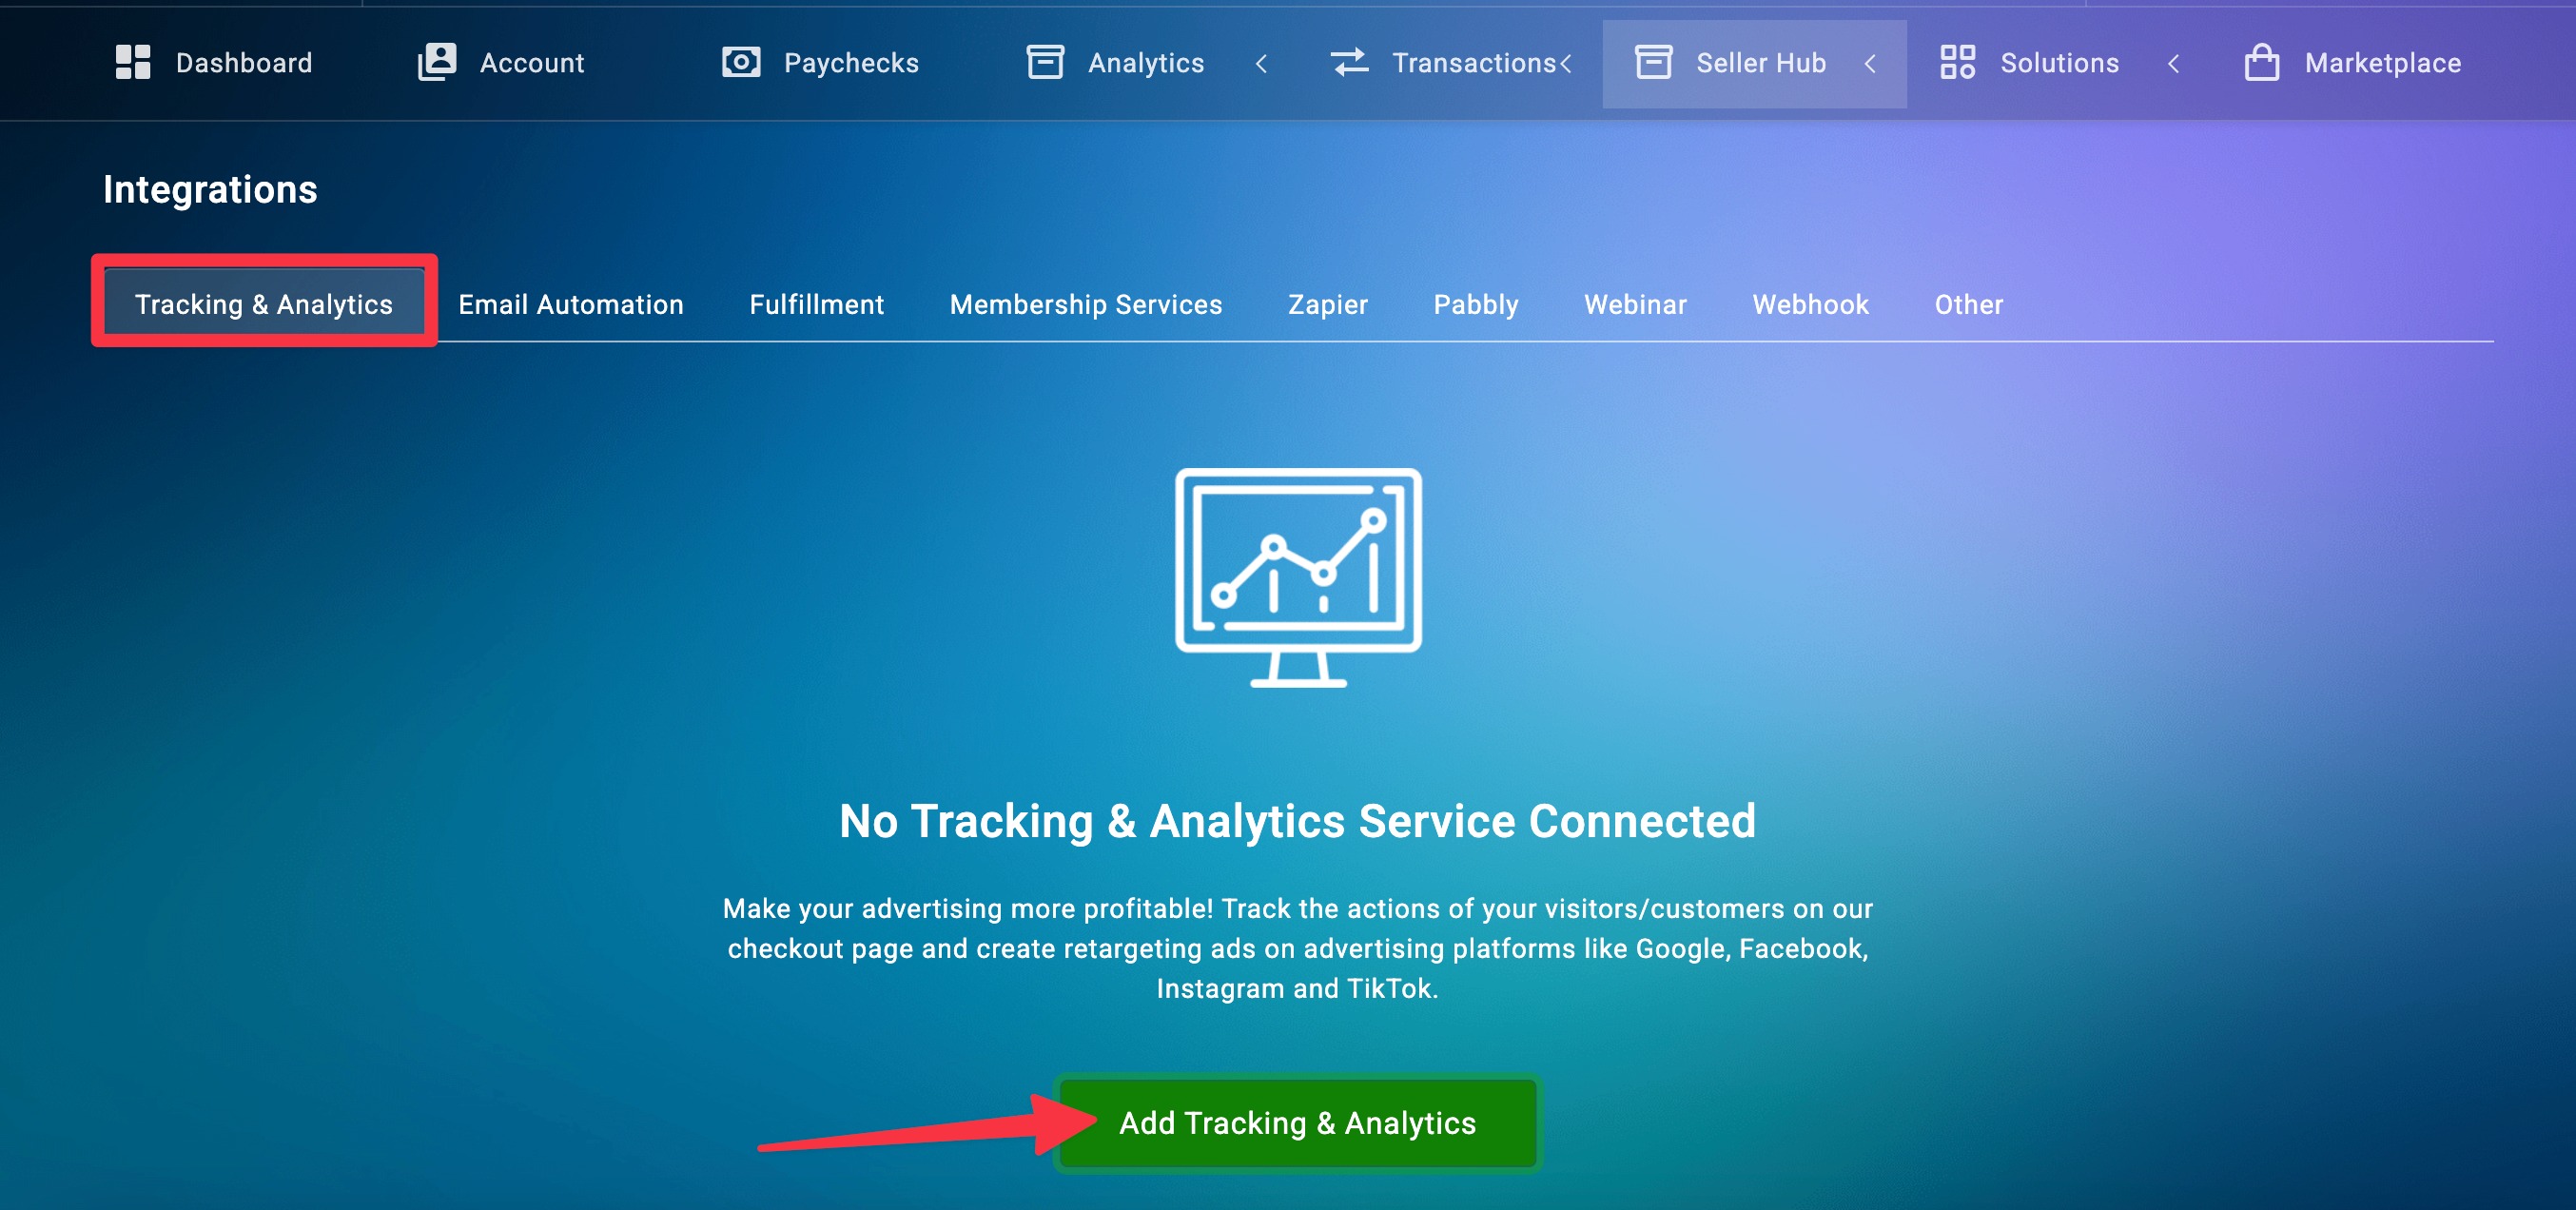
iii) Click on Add Tracking & Analytics then select UTMify from the dropdown.
iv) Paste the API Key you copied from UTMify into the provided field.
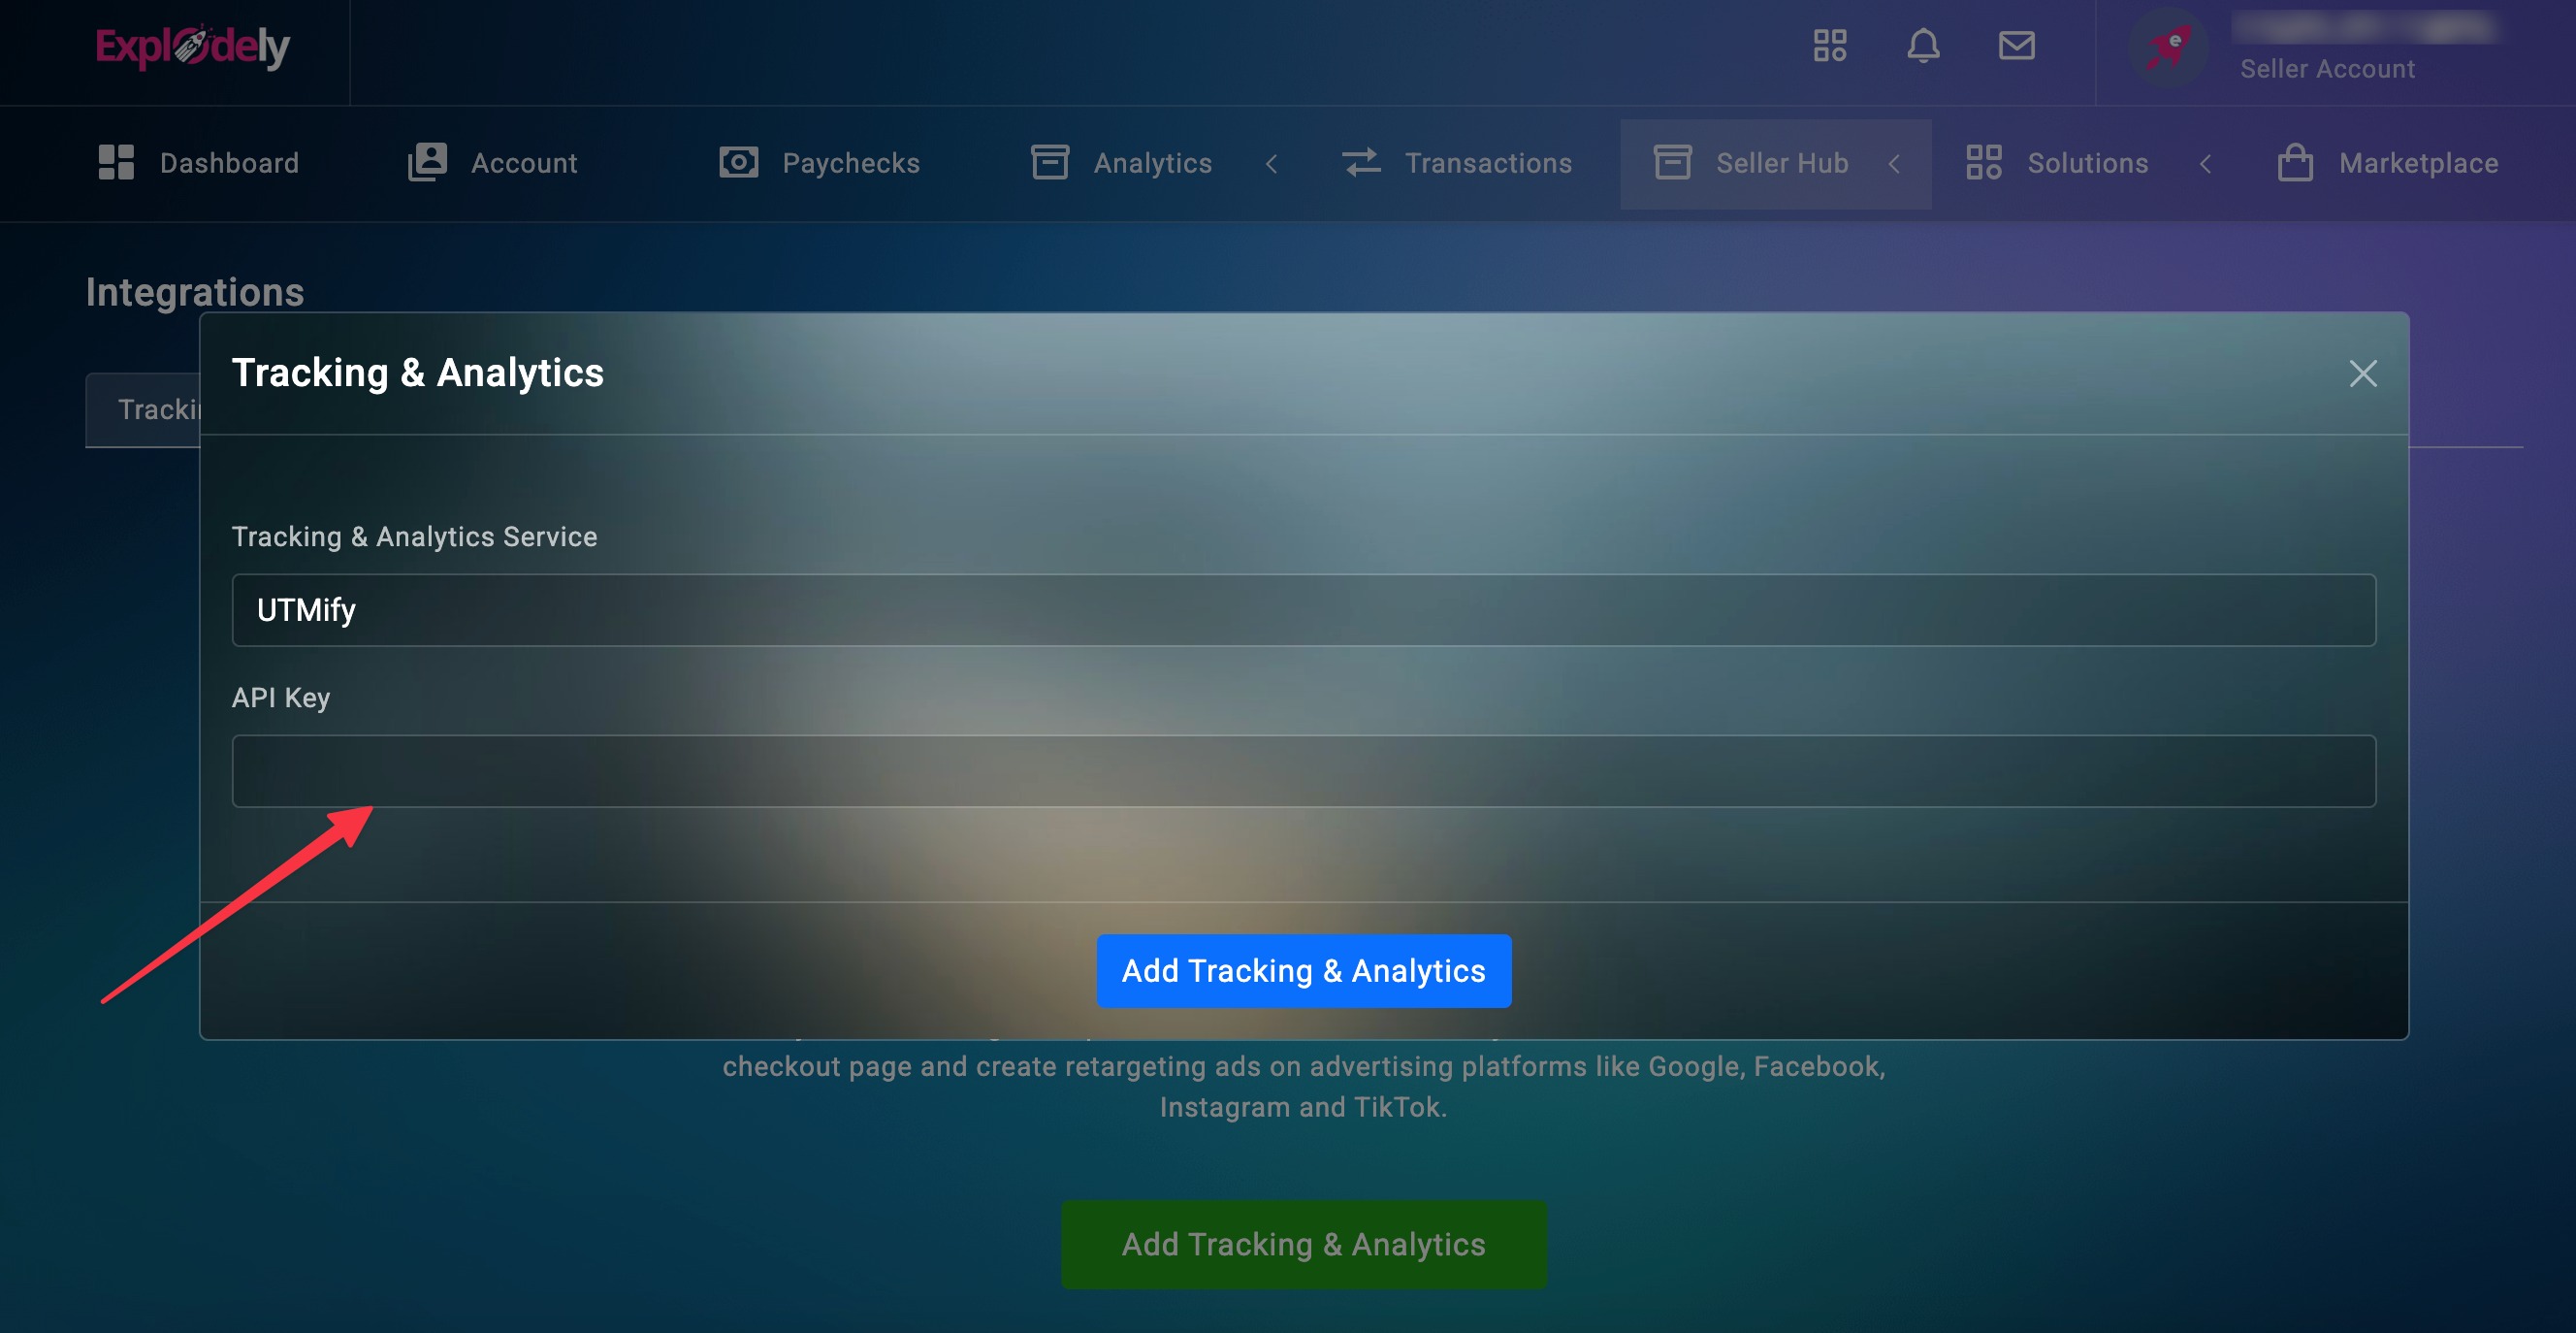
v) Click Add Tracking & Analytics to save your changes.
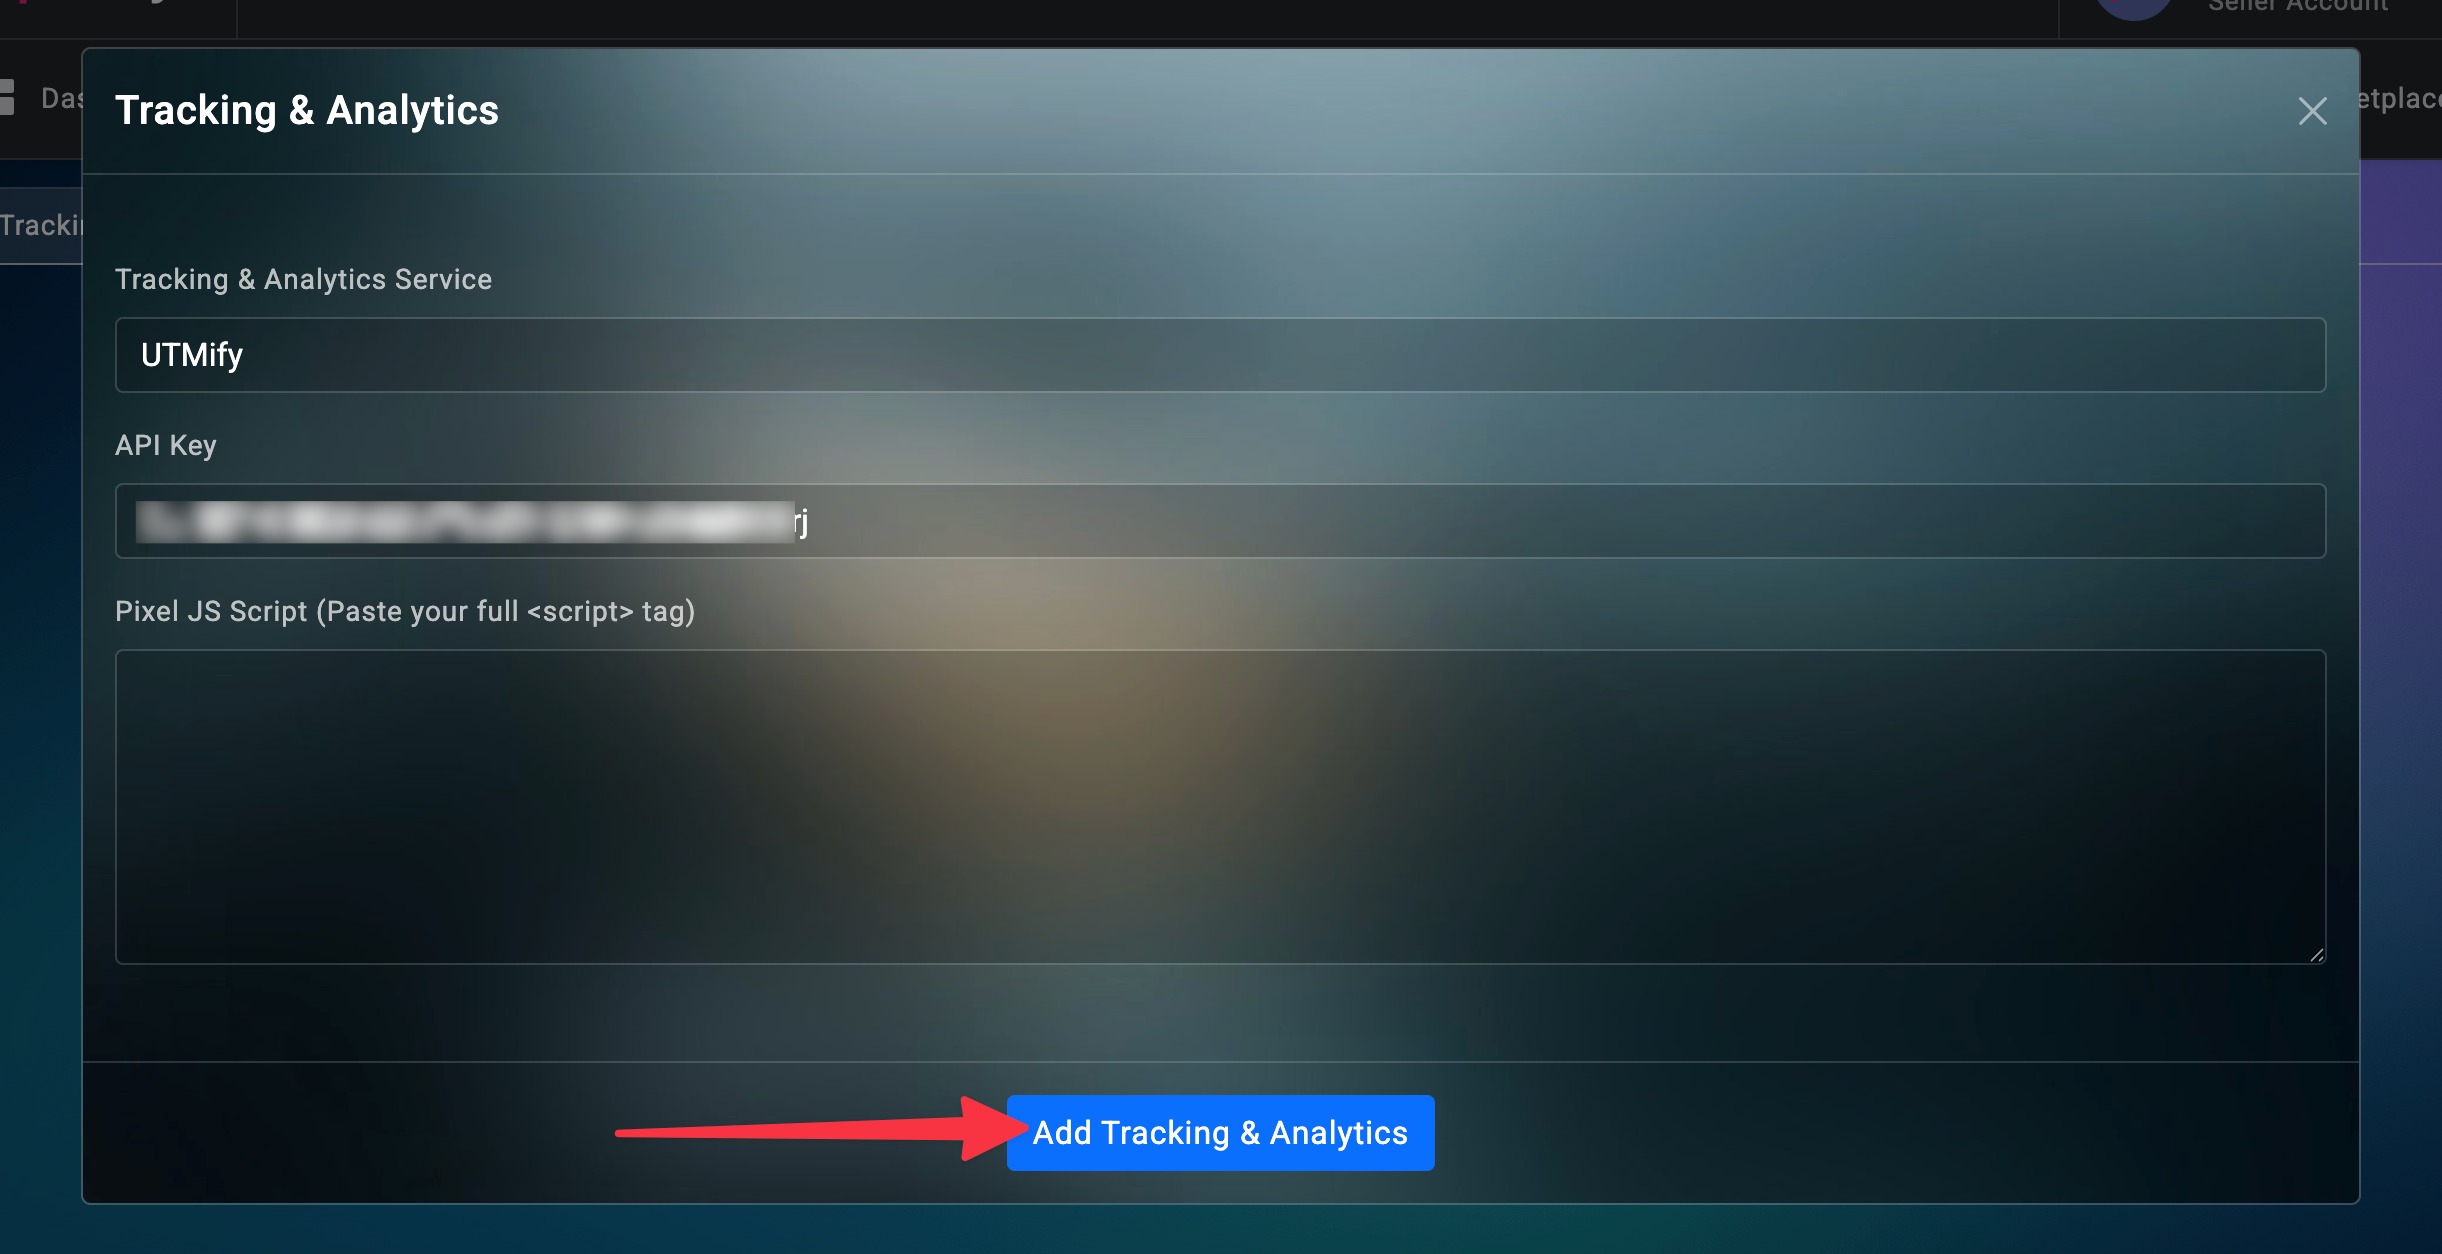
Once saved, your Explodely account will be connected to UTMify.
Step 3: Add the UTMify Script to your pages
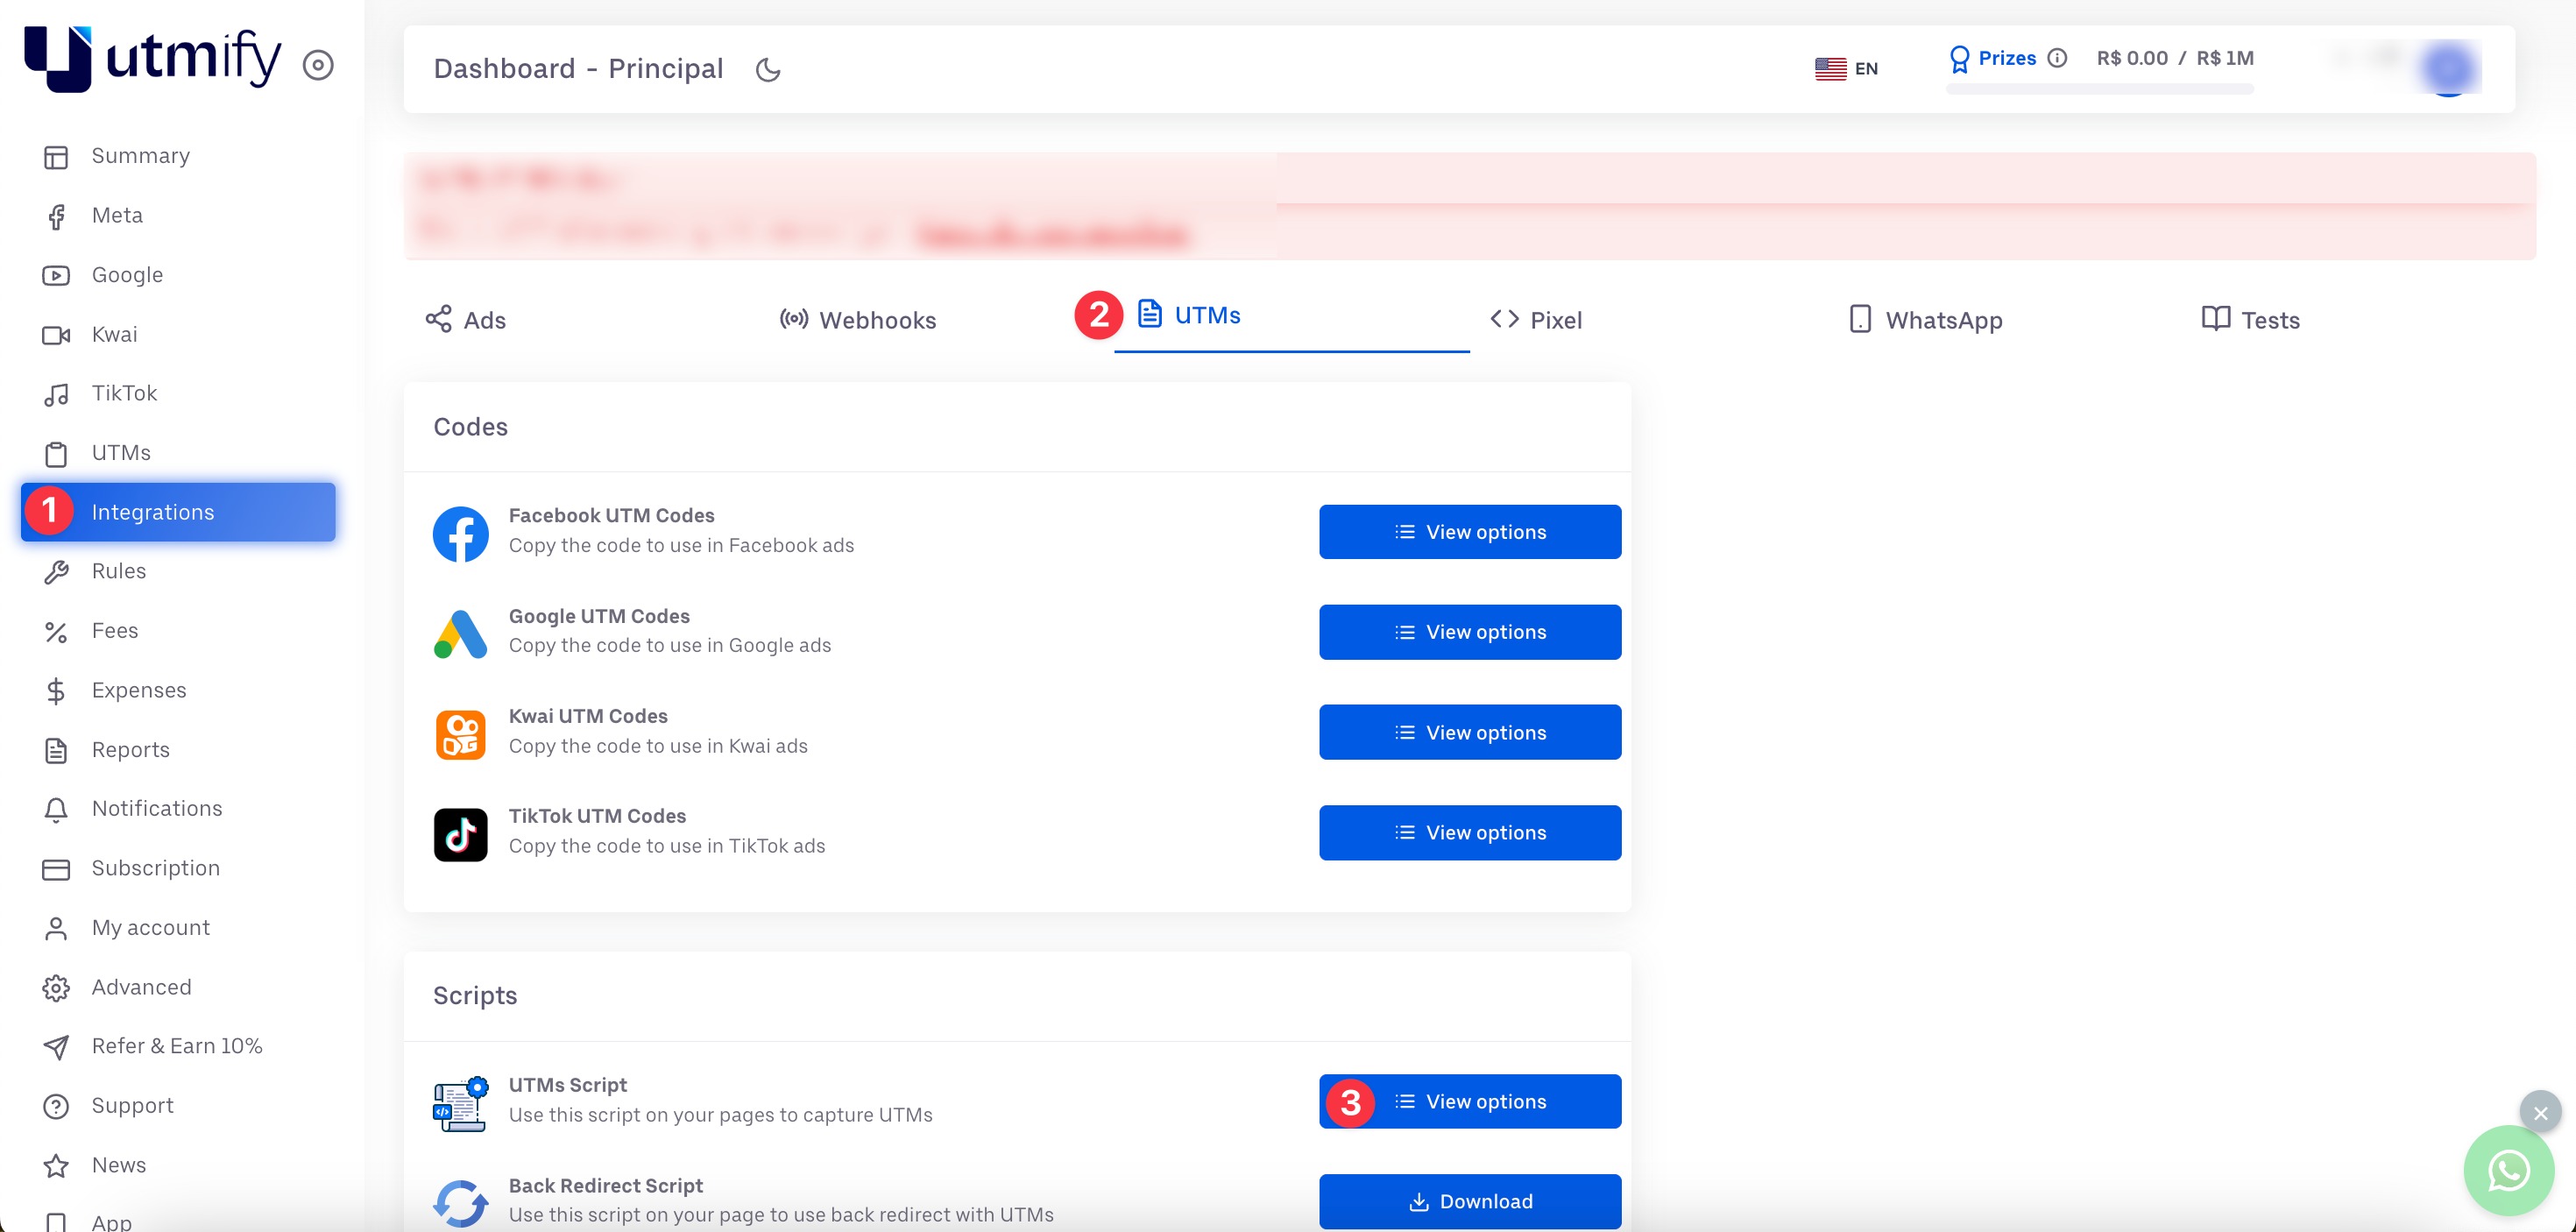
i) In your UTMify account, go to Integrations → UTMs → UTMs Script.
ii) Select Other from the list and click Download.
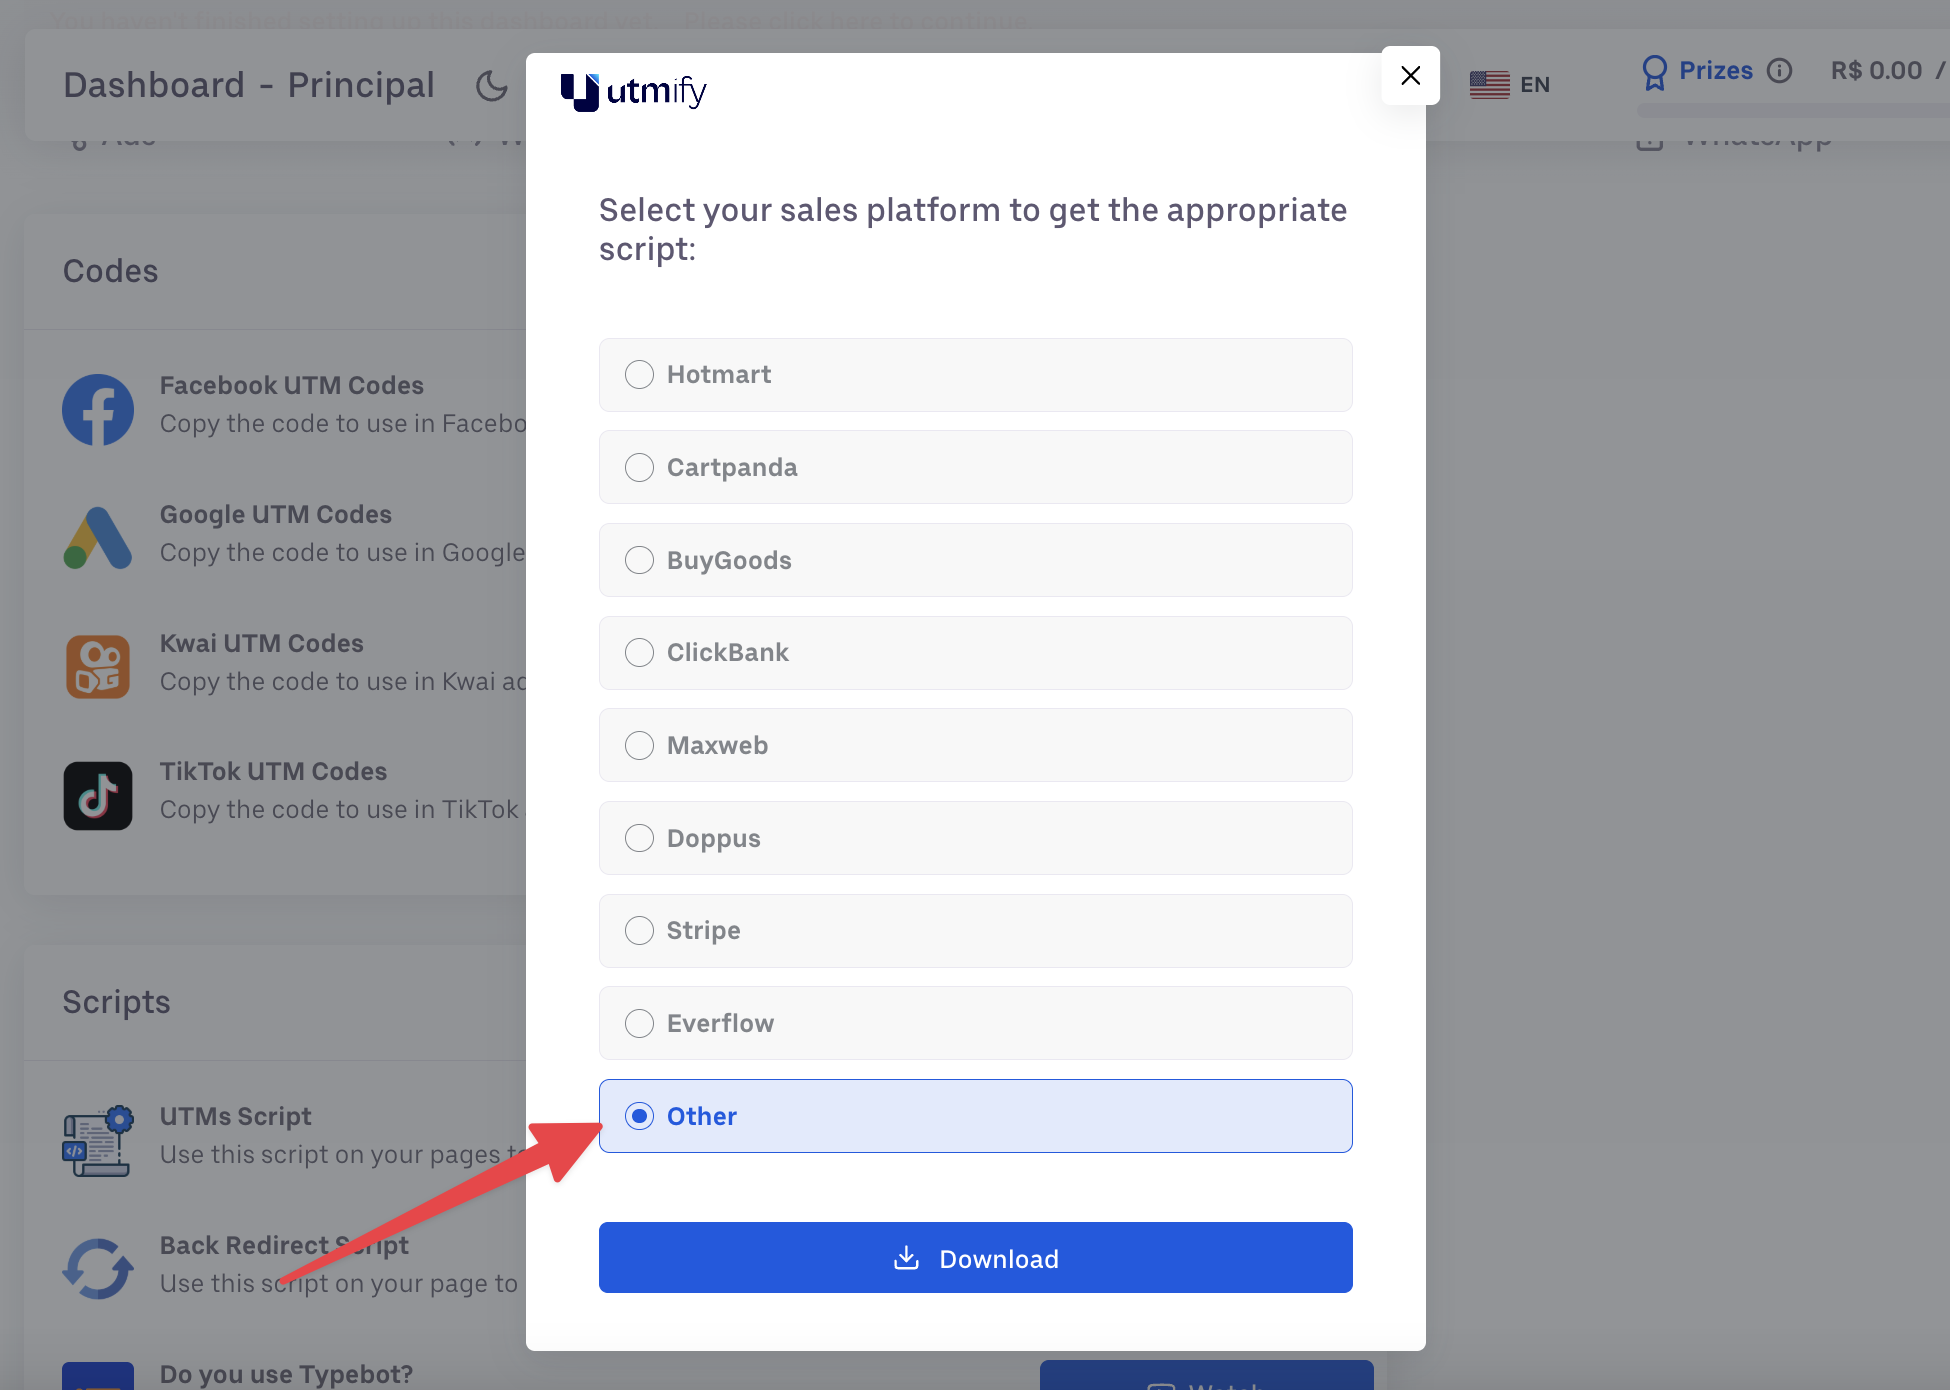
iv) Now copy the script from the downloaded document and add it to the Header section of your page.
Your setup for sales tracking is complete.
Initiate Checkout Tracking
i) To setup Initiate Checkout Tracking, go to Integrations → Pixel → Add Pixel.
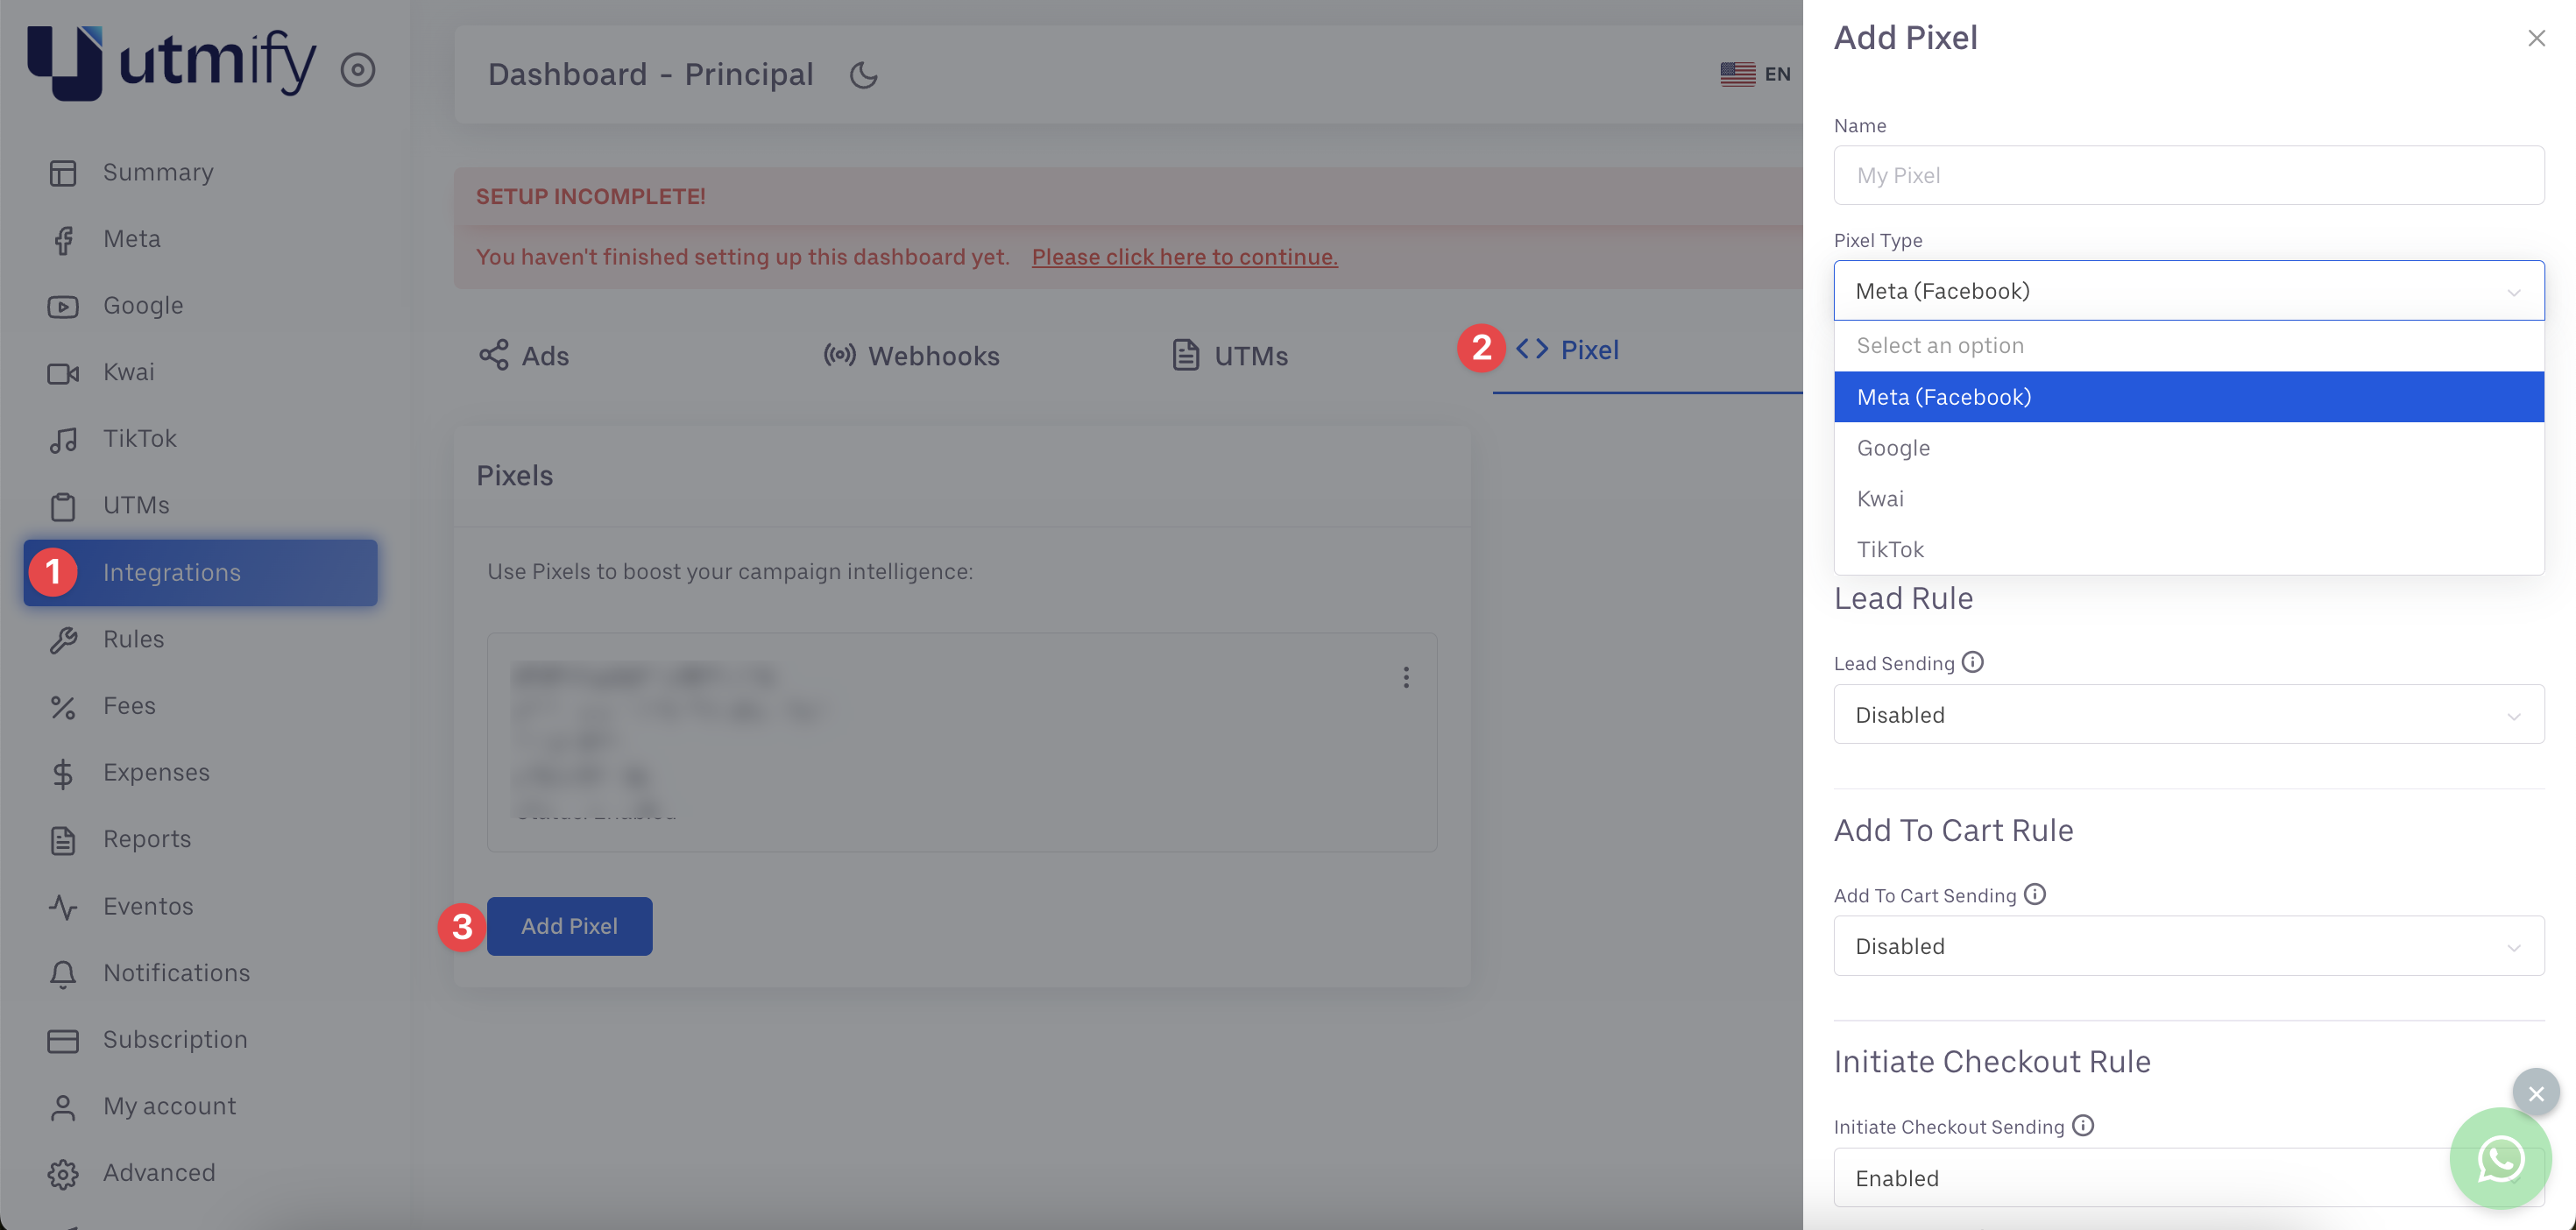
ii) Then select your Pixel Type (Meta, Google or TikTok), set the rules and save the pixel.
Note: Initiate Checkout Tracking does not work for Kwai.
iii) Once saved, copy the pixel code.
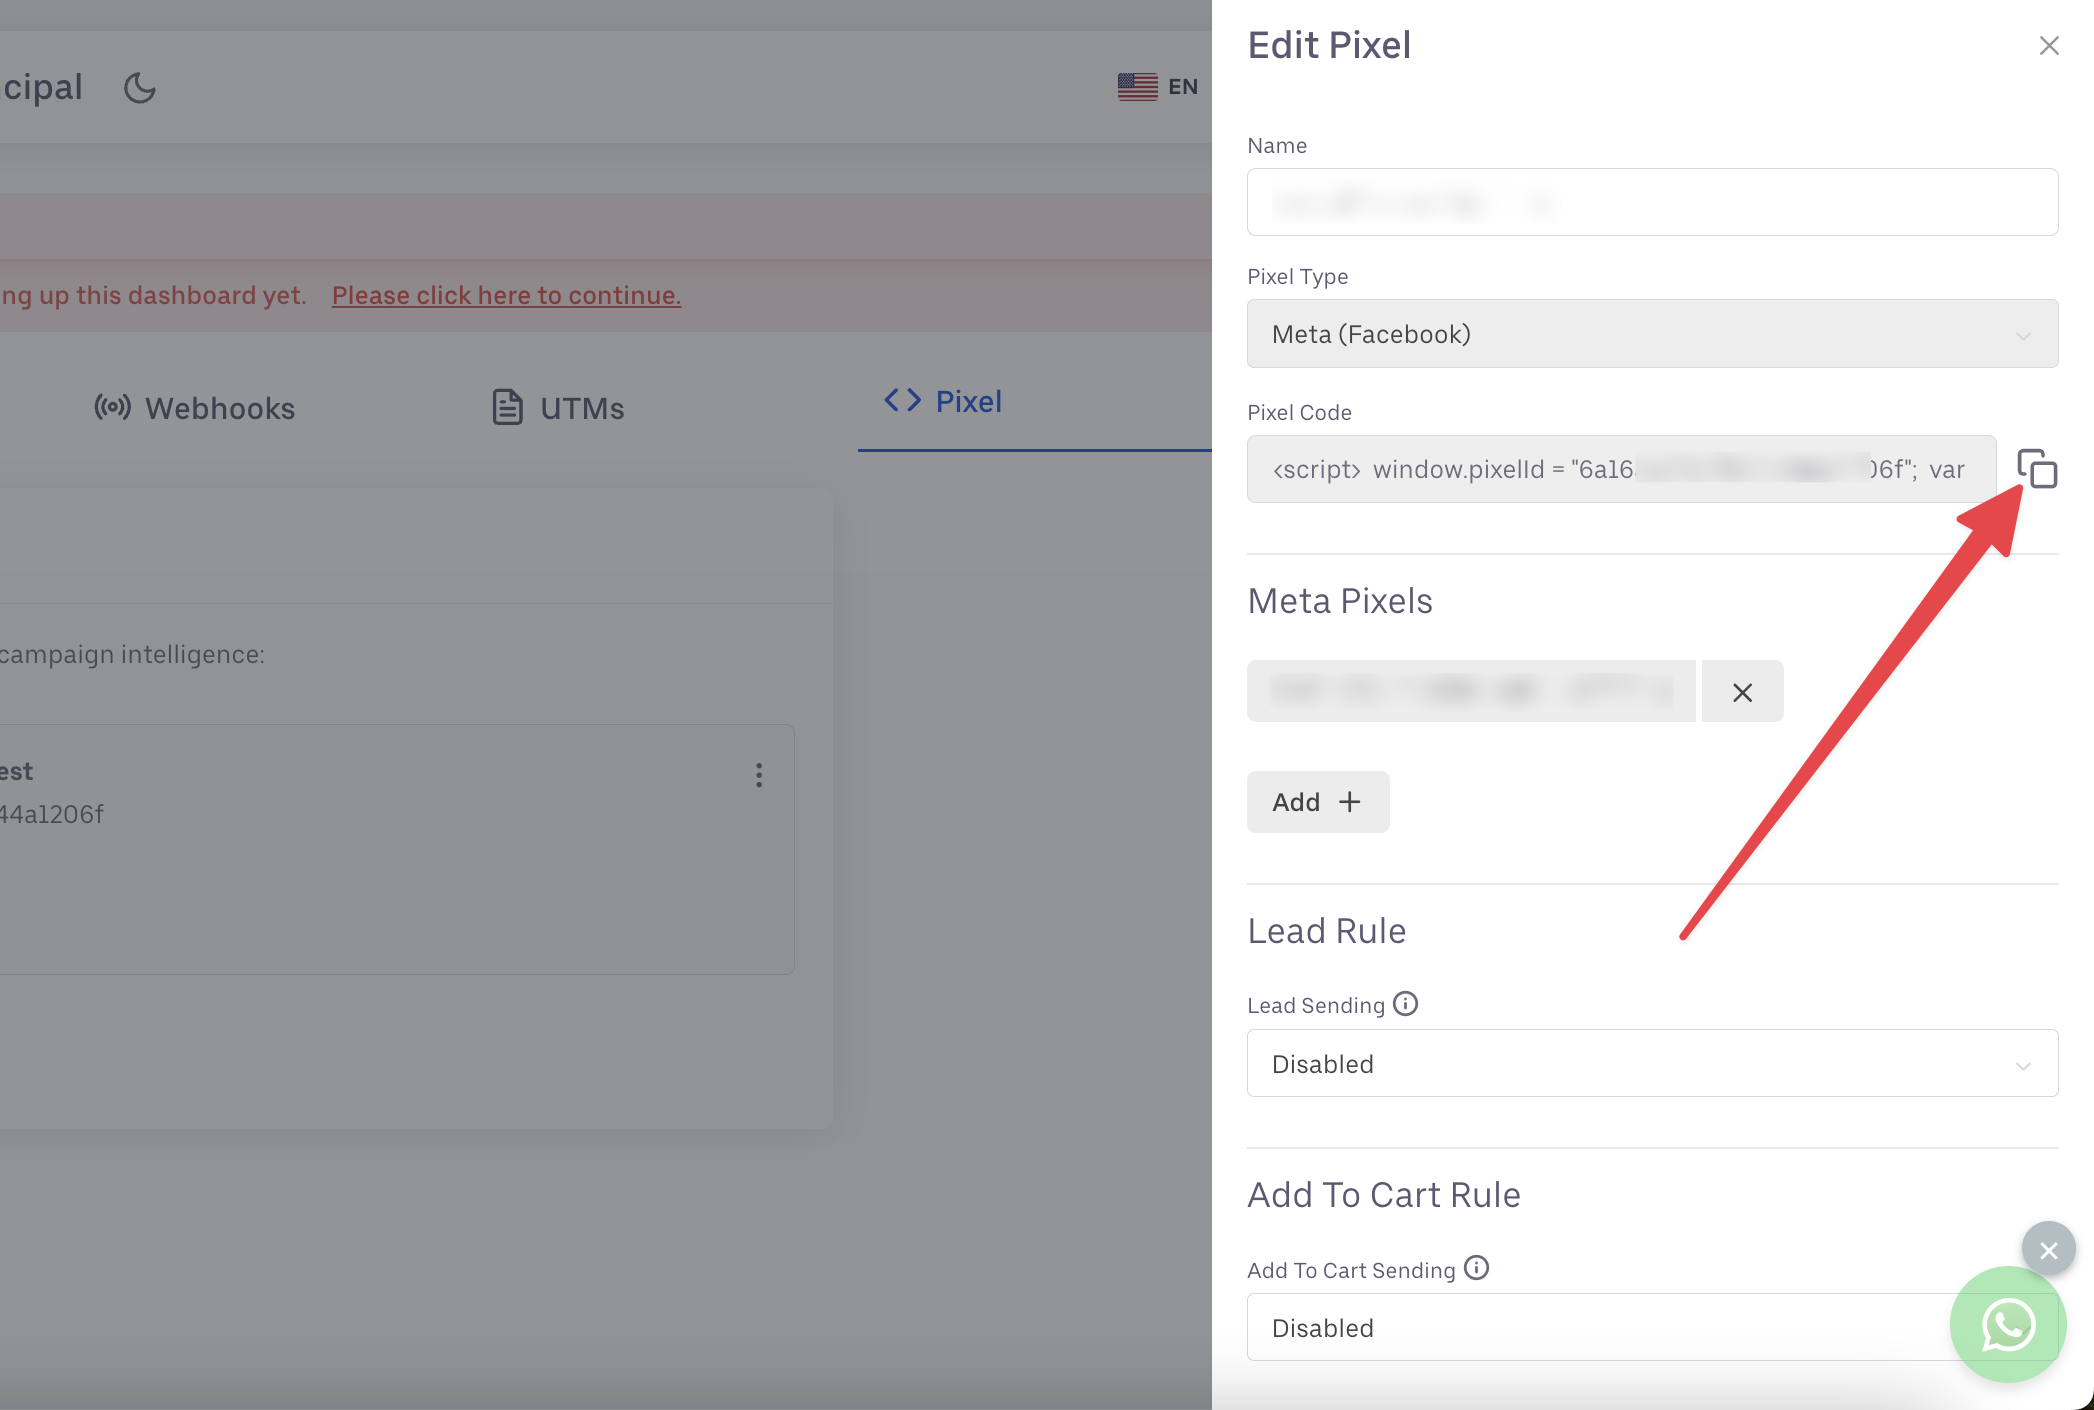
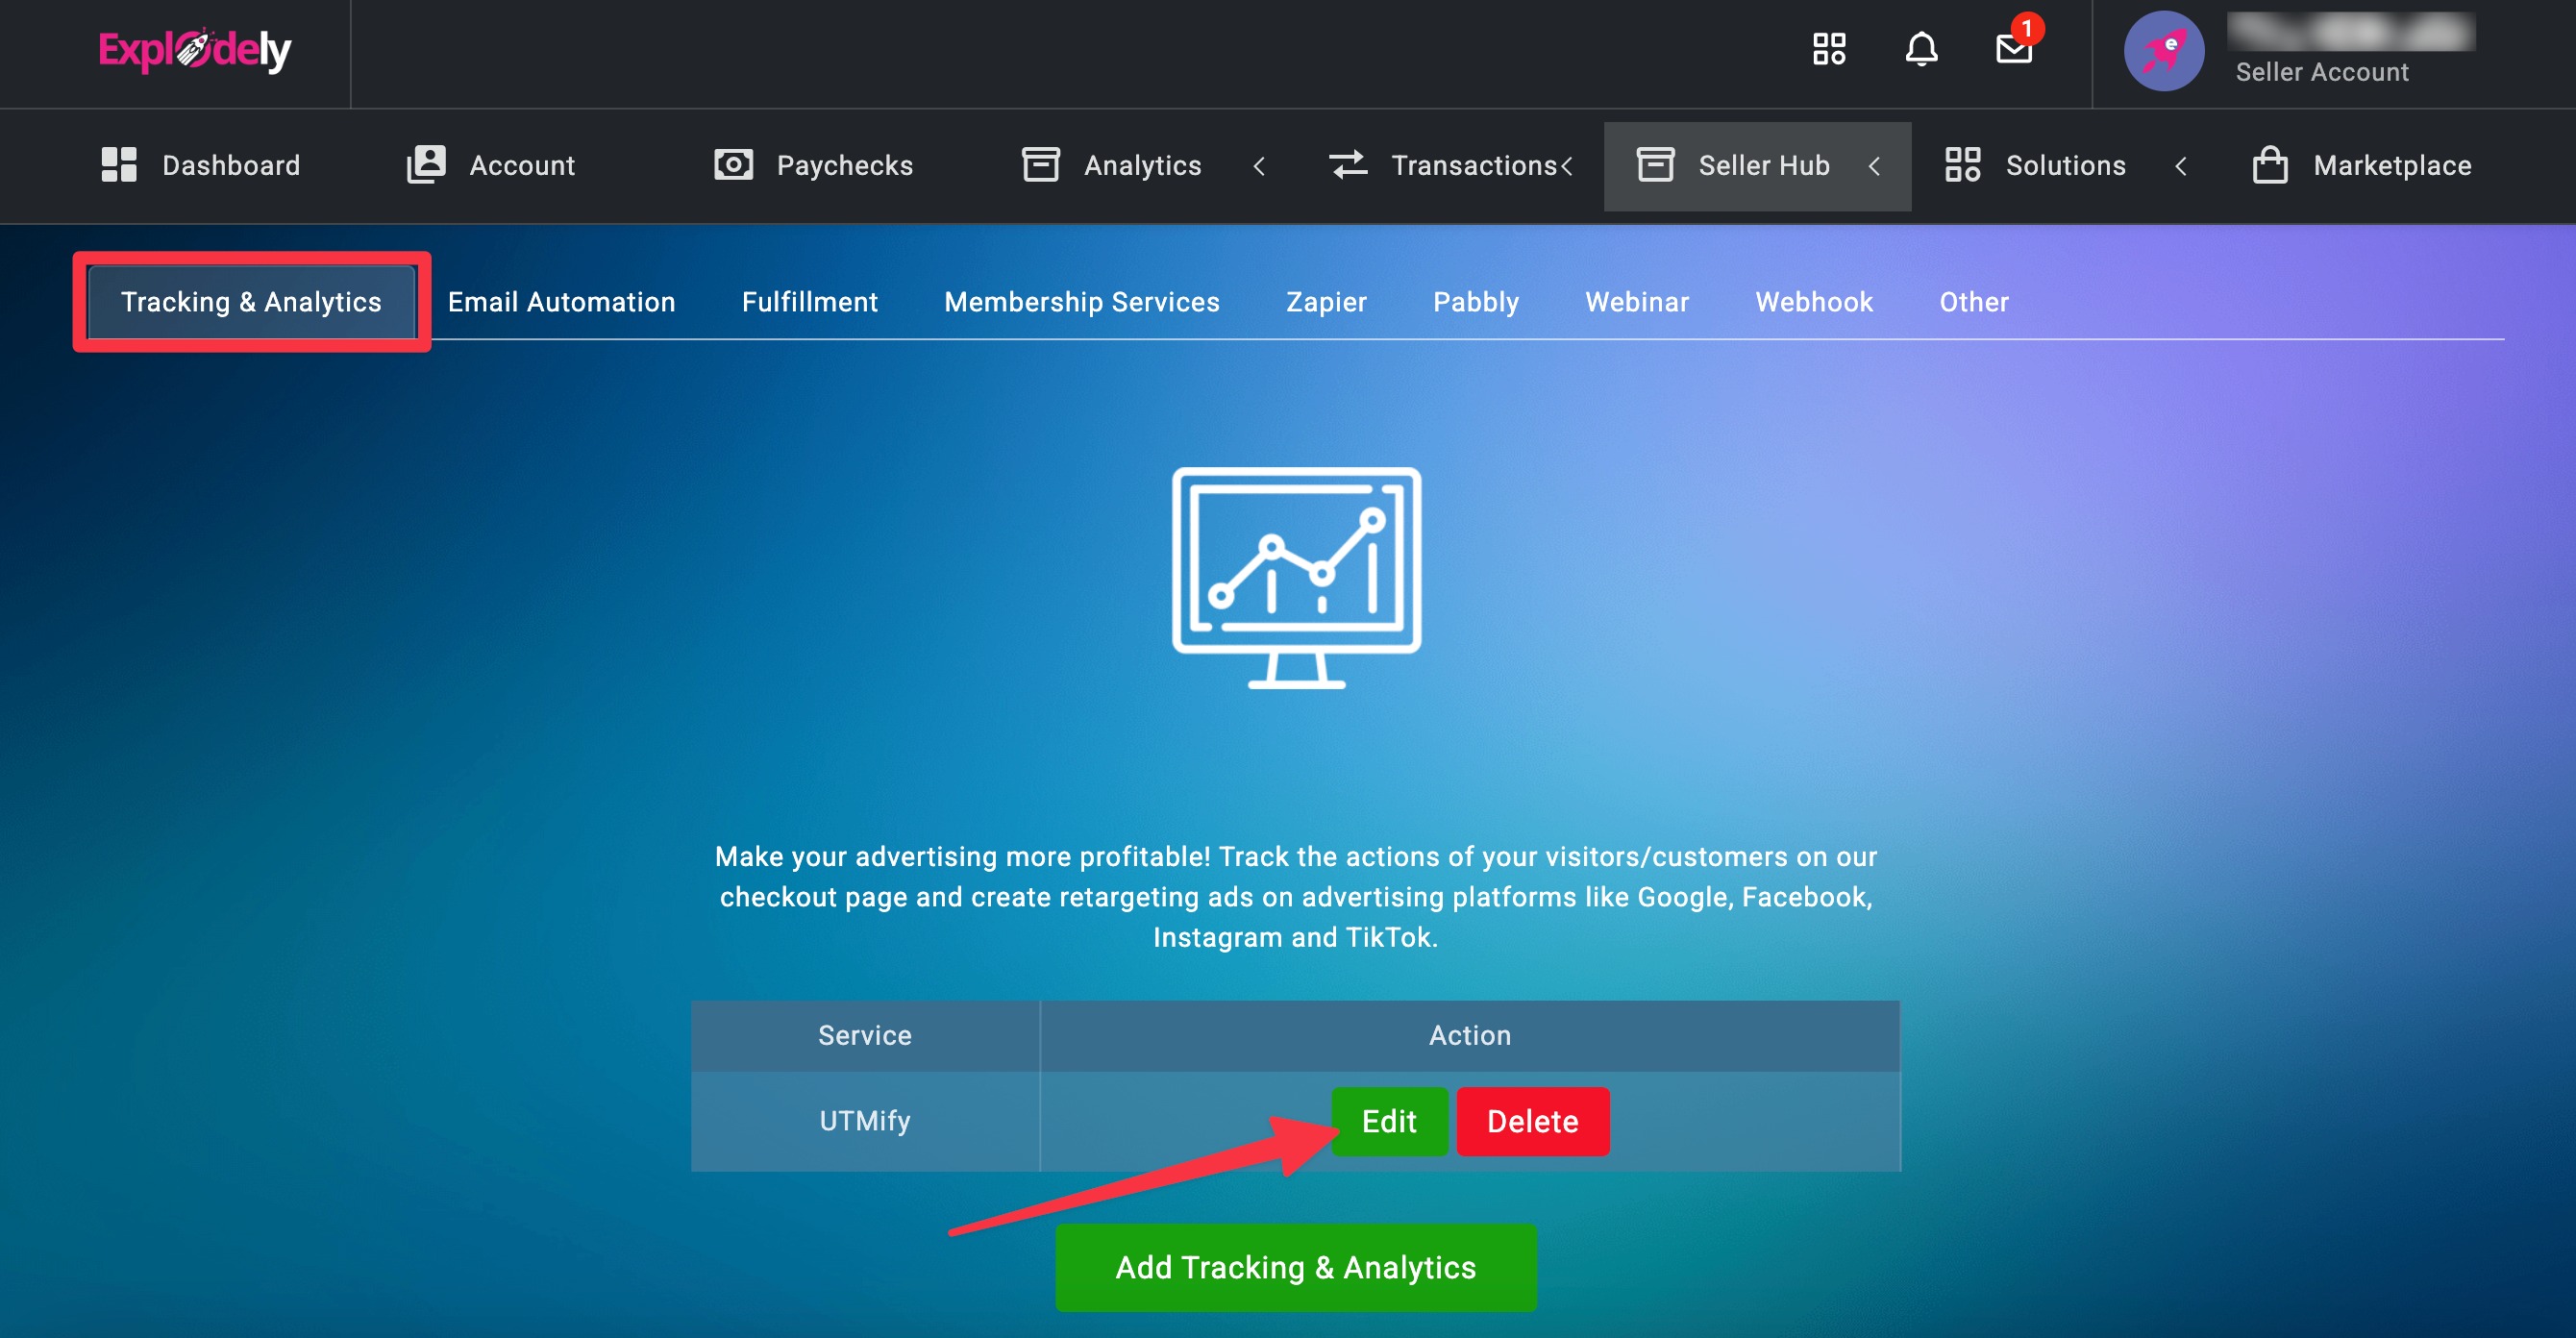
iv) Now log into your Explodely account and go to Seller Hub → Integrations.
v) Now click on Edit for UTMify in the Tracking & Analytics section.
vi) Add the Pixel code/ script in the field and click on Add Tracking & Analytics to save changes.
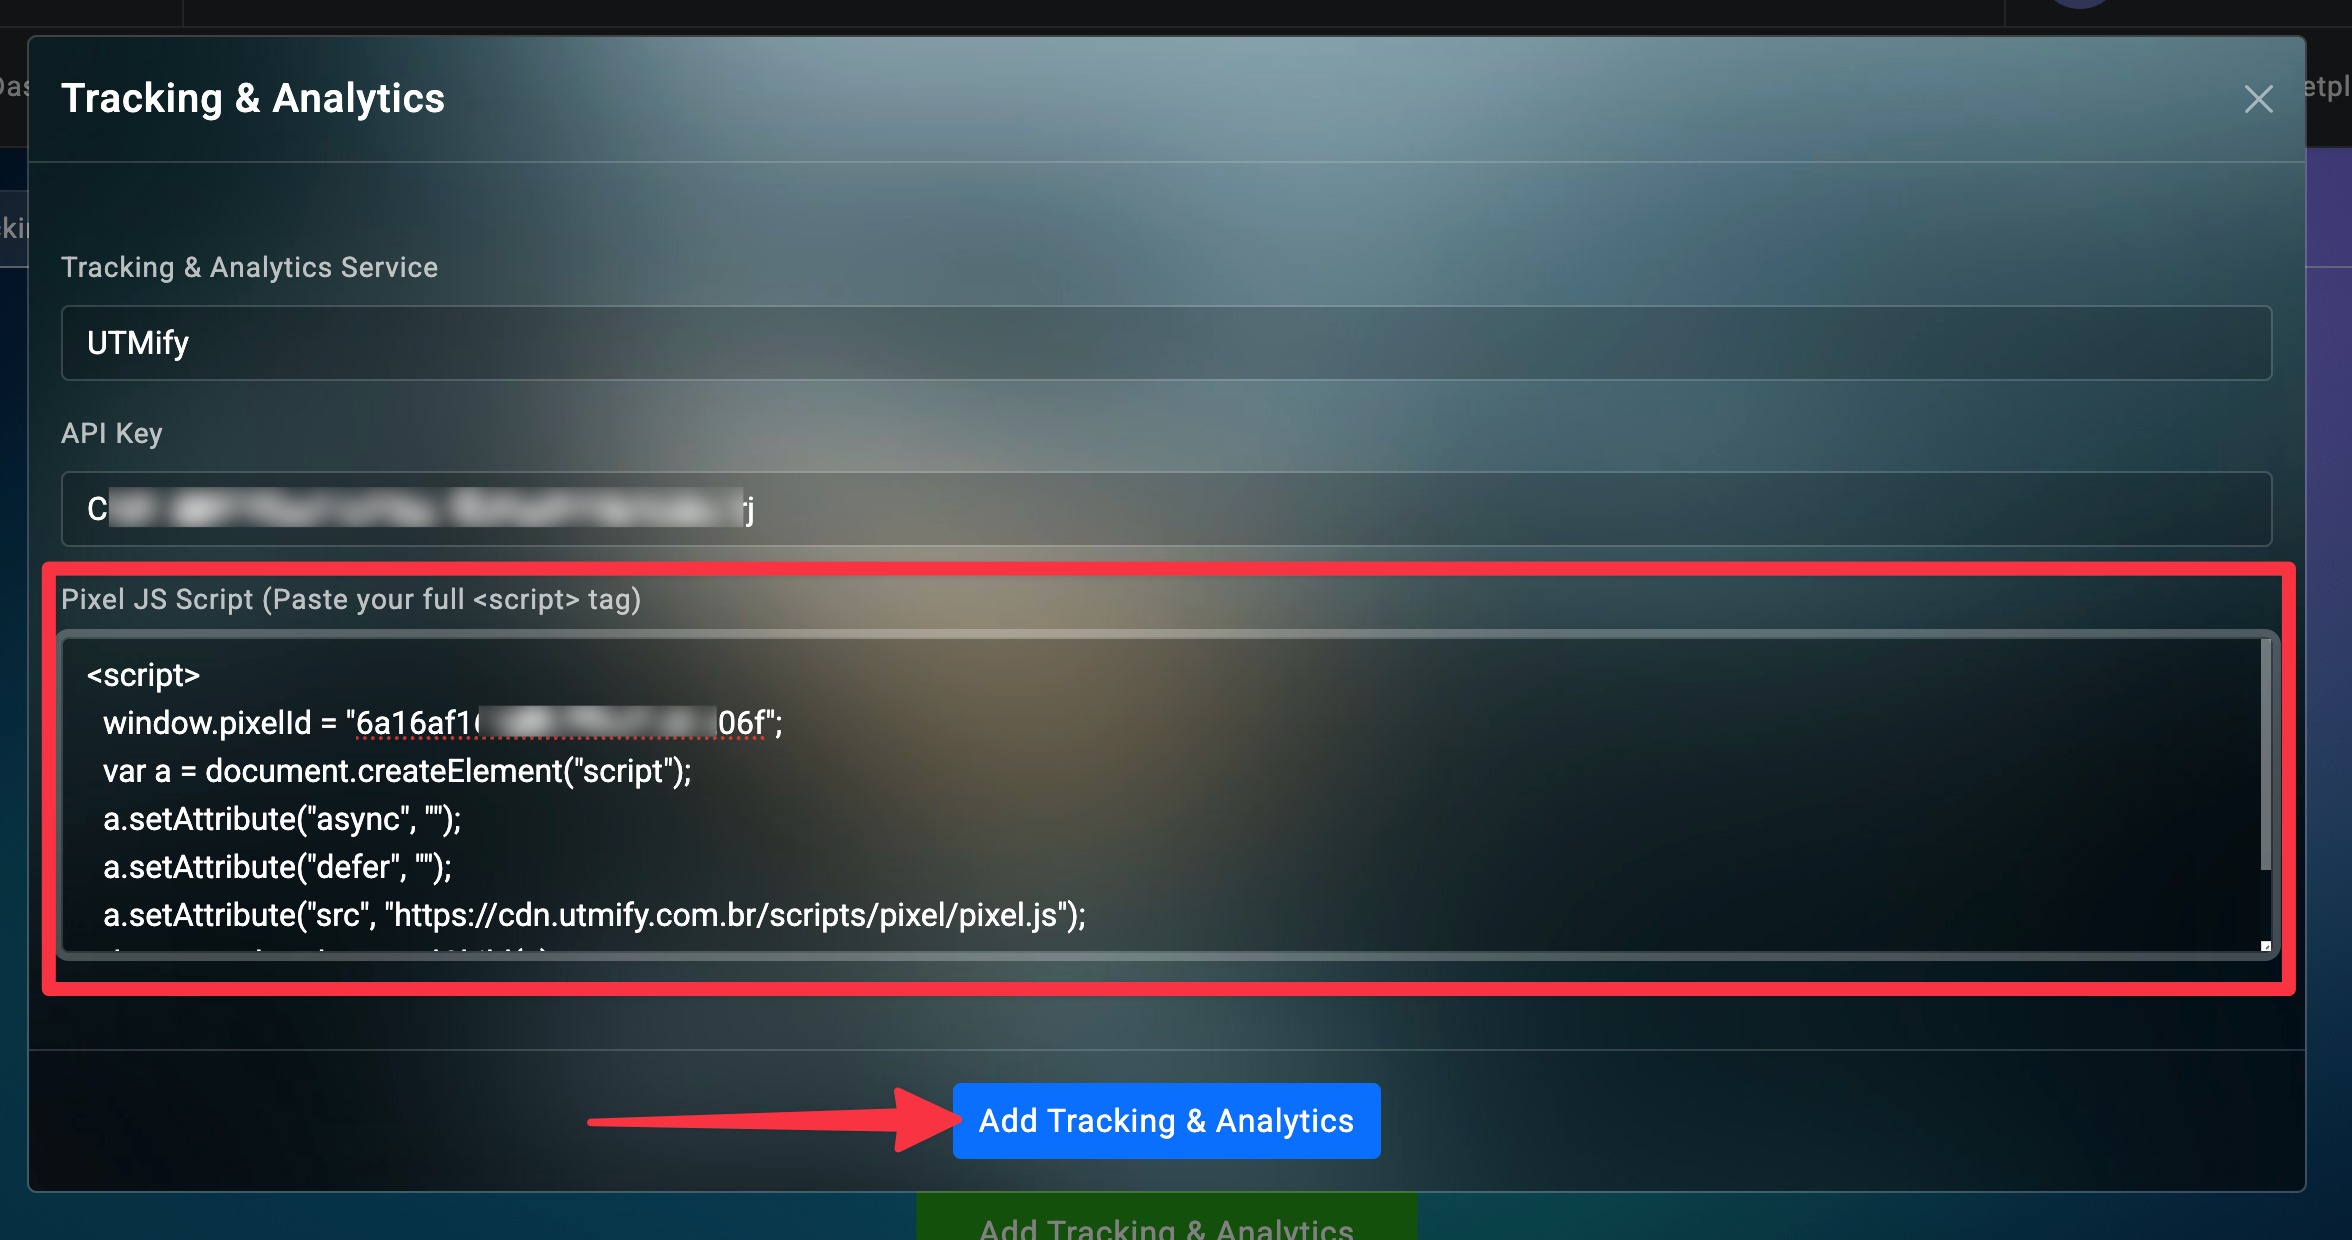
Now your Initiate Checkout events will also get tracked.
Testing Integration
To ensure a successful integration, we strongly recommend performing a test sale to verify that everything is working correctly. This will help confirm that the integration has been set up properly.
To begin, add UTM parameters to the URL of your sales page and visit the page using that URL.
You can include parameters such as utm_campaign, utm_source, utm_medium, and utm_content, based on your tracking requirements.
These UTM parameters will be automatically carried over to the payment link. Once this is done, you can proceed with a test sale.
Here's how you can do a test sale:
When a sale is made, it will be attributed to your account and sent to UTMify. You can then view and analyze the sale within your UTMify account.
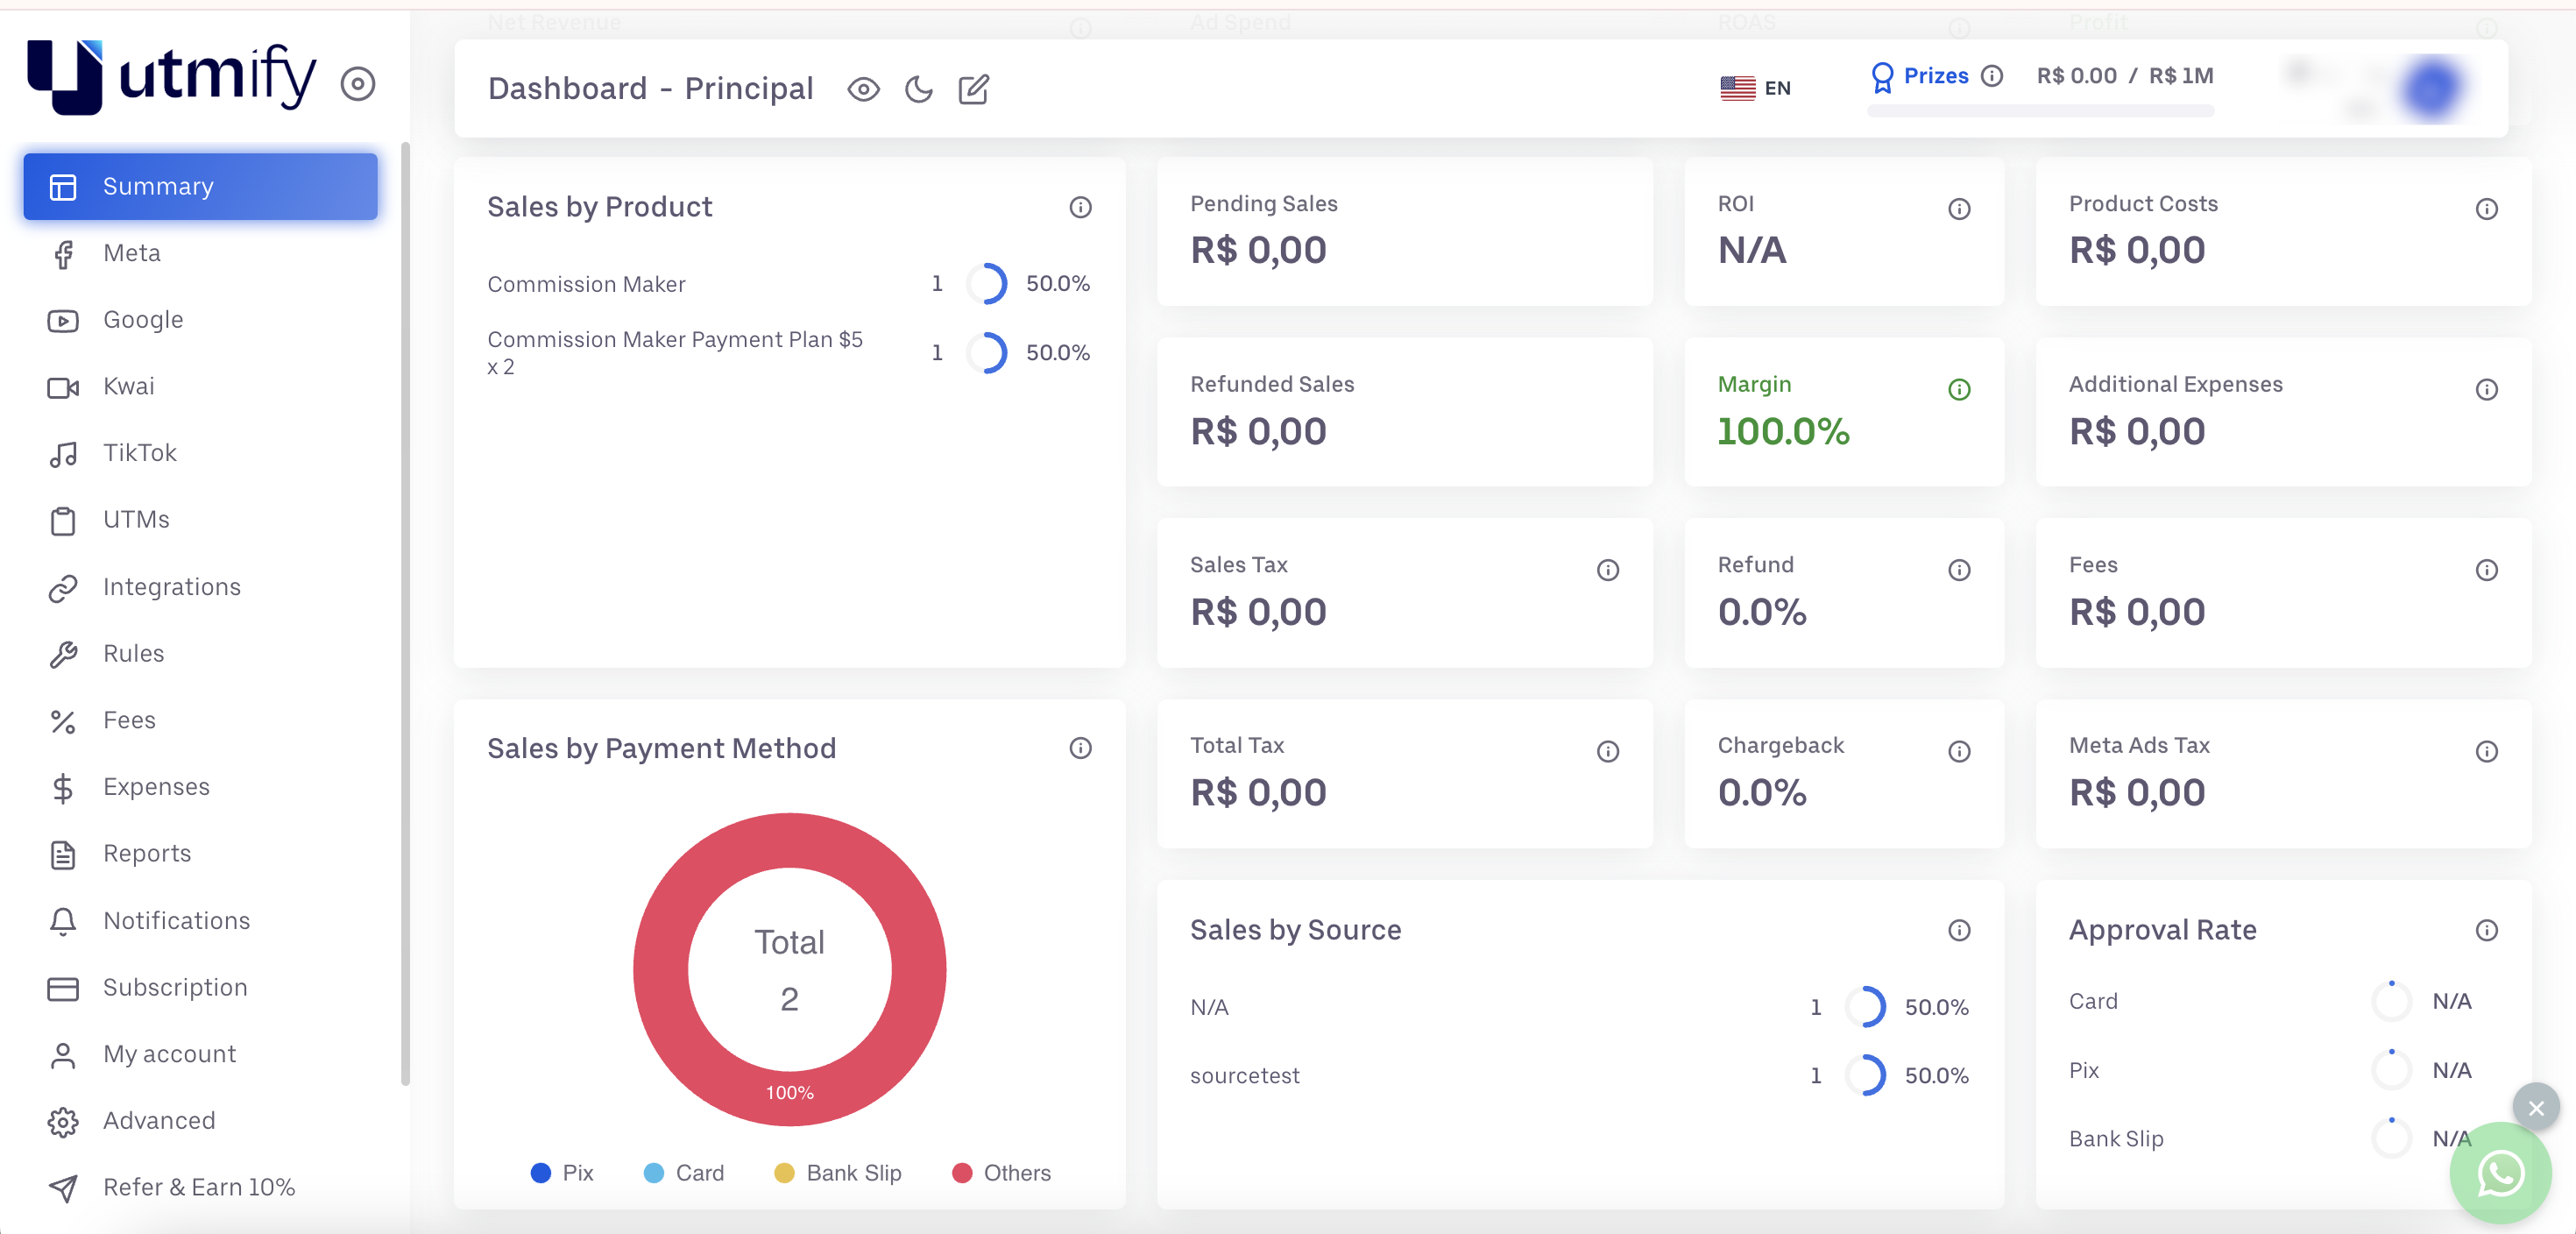
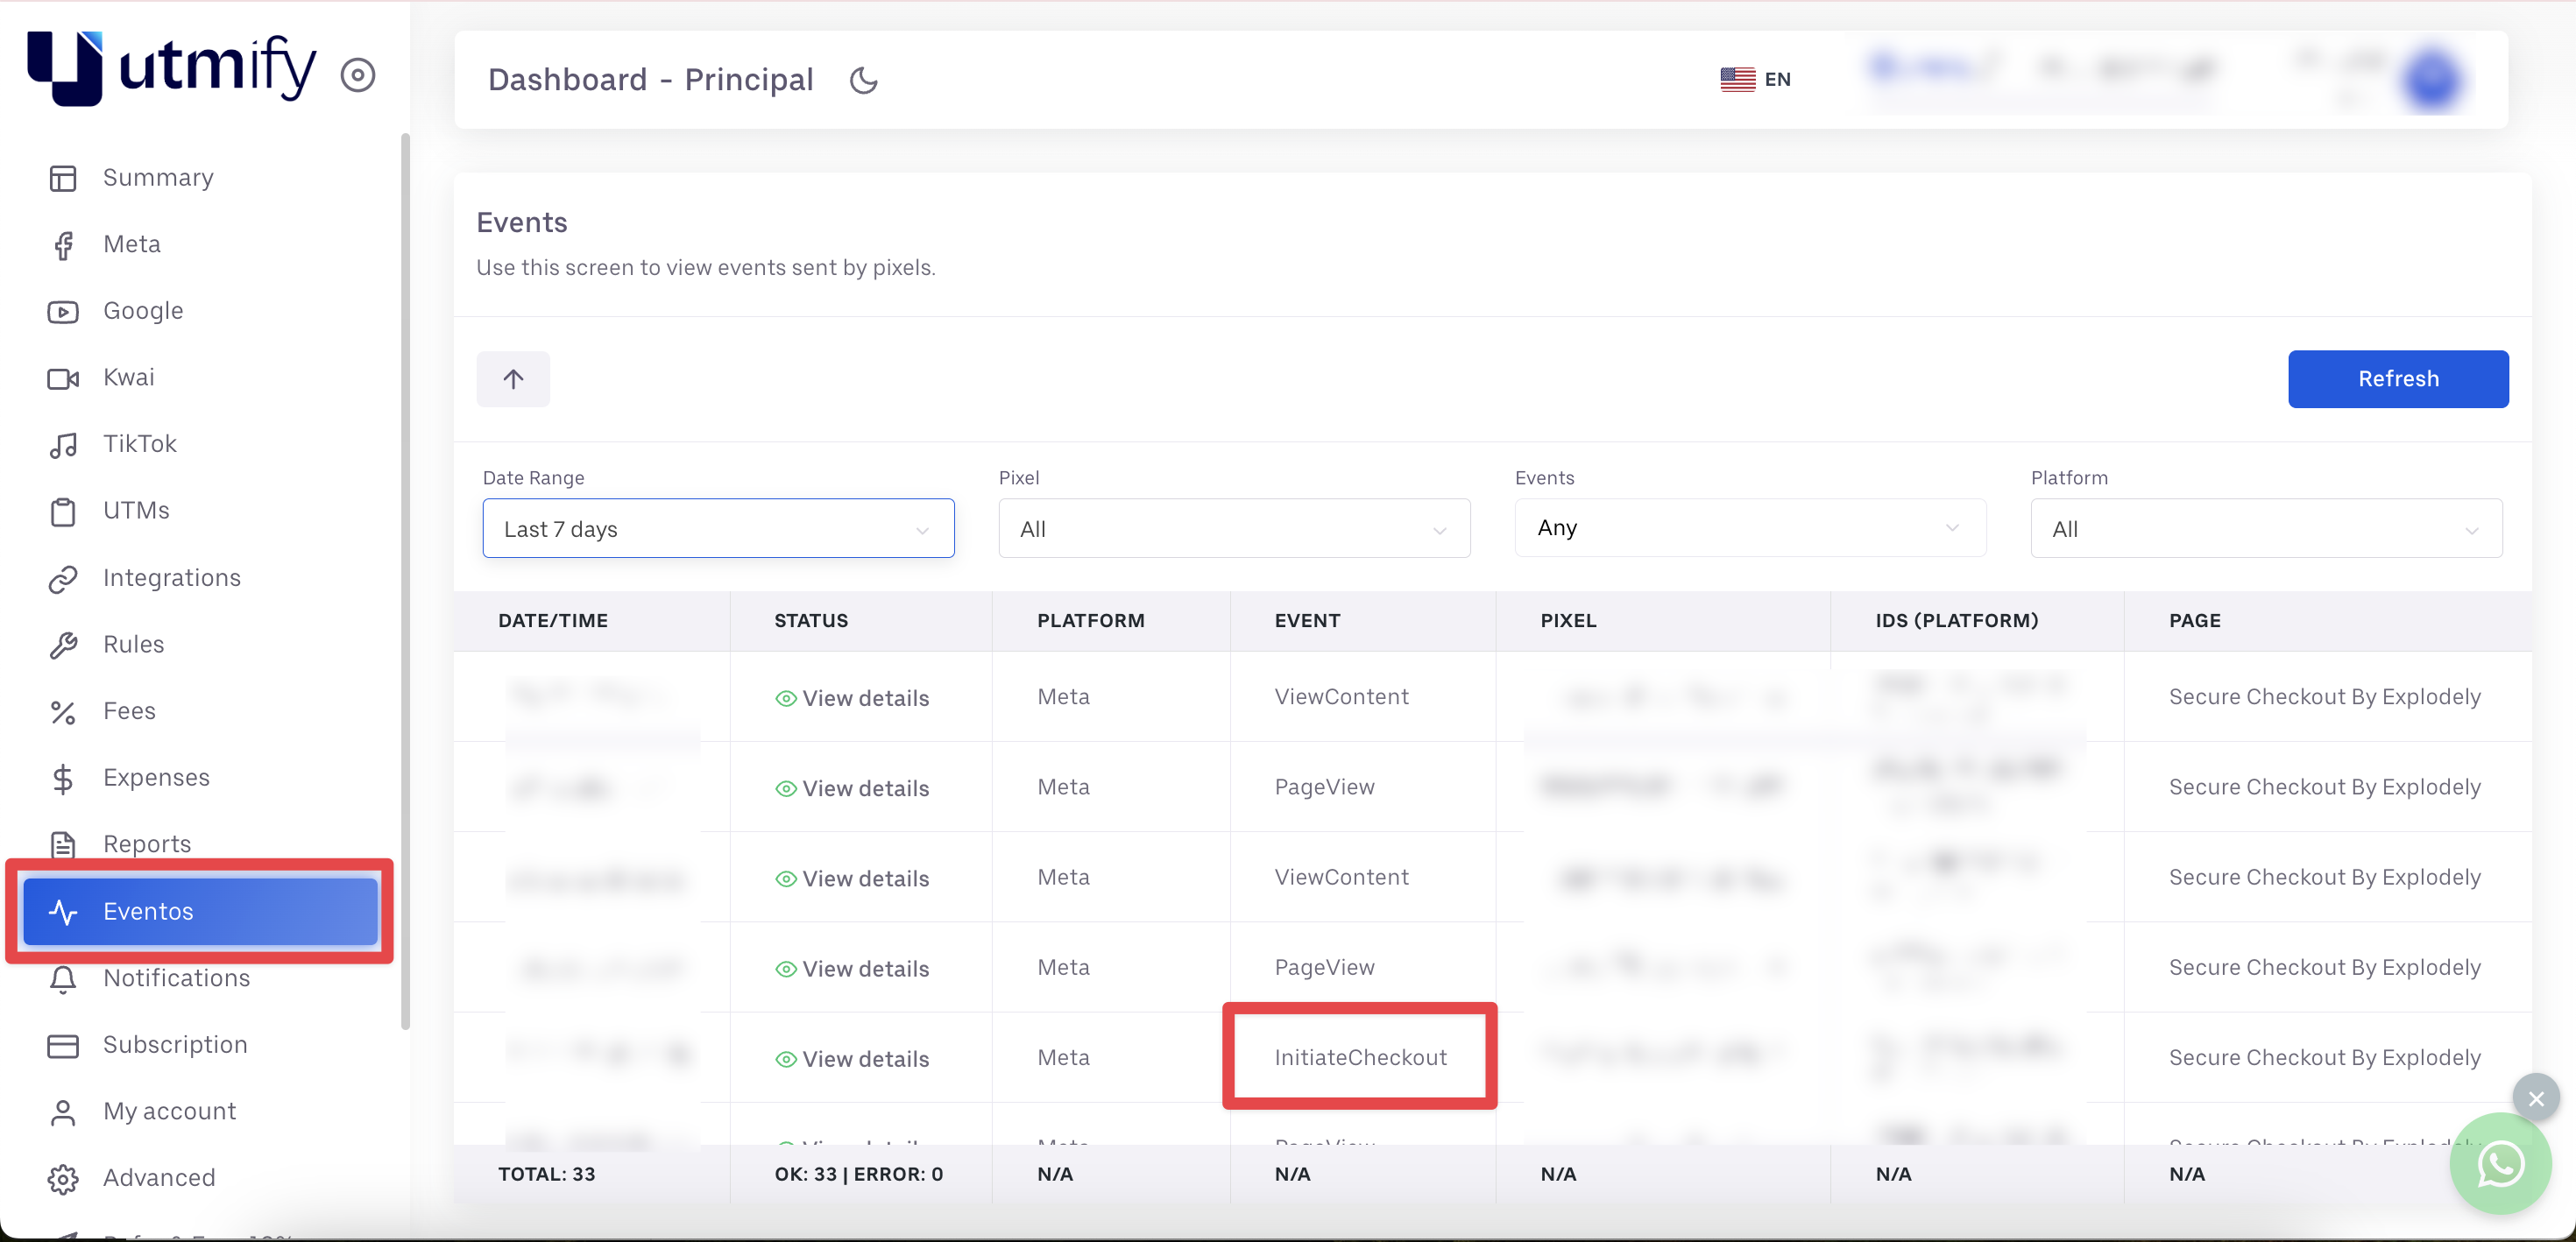
Your Initiate Checkout event will appear in the Events section of your UTMify account, as well as in your connected advertising platforms such as Meta, Google, or TikTok.
By connecting UTMify with your Explodely account, you gain reliable and accurate campaign tracking. Once the setup is complete, the system handles everything automatically.
Please contact us if you have any questions or concerns at sellers@explodely.com.