To start your journey as a successful seller, you must add products to your Explodely seller account. Once you submit a product, it goes through a compliance review. After the compliance requirements are met and your product is approved, you can start attracting affiliates and making sales.
Before you start adding products to your account, as a prerequisite, please detail your entire sales funnel and flow with proper Sales pages, Thank you pages and prices so that you don't get stuck while setting products.
The Add Product form is divided into four sections:
- Product Settings
- Price & Affiliate Settings
- Integration Settings
- Additional Settings & Features
Follow these steps to add a product to your seller account:
Step 1: Log into your account using the link: https://explodely.com/seller/signin
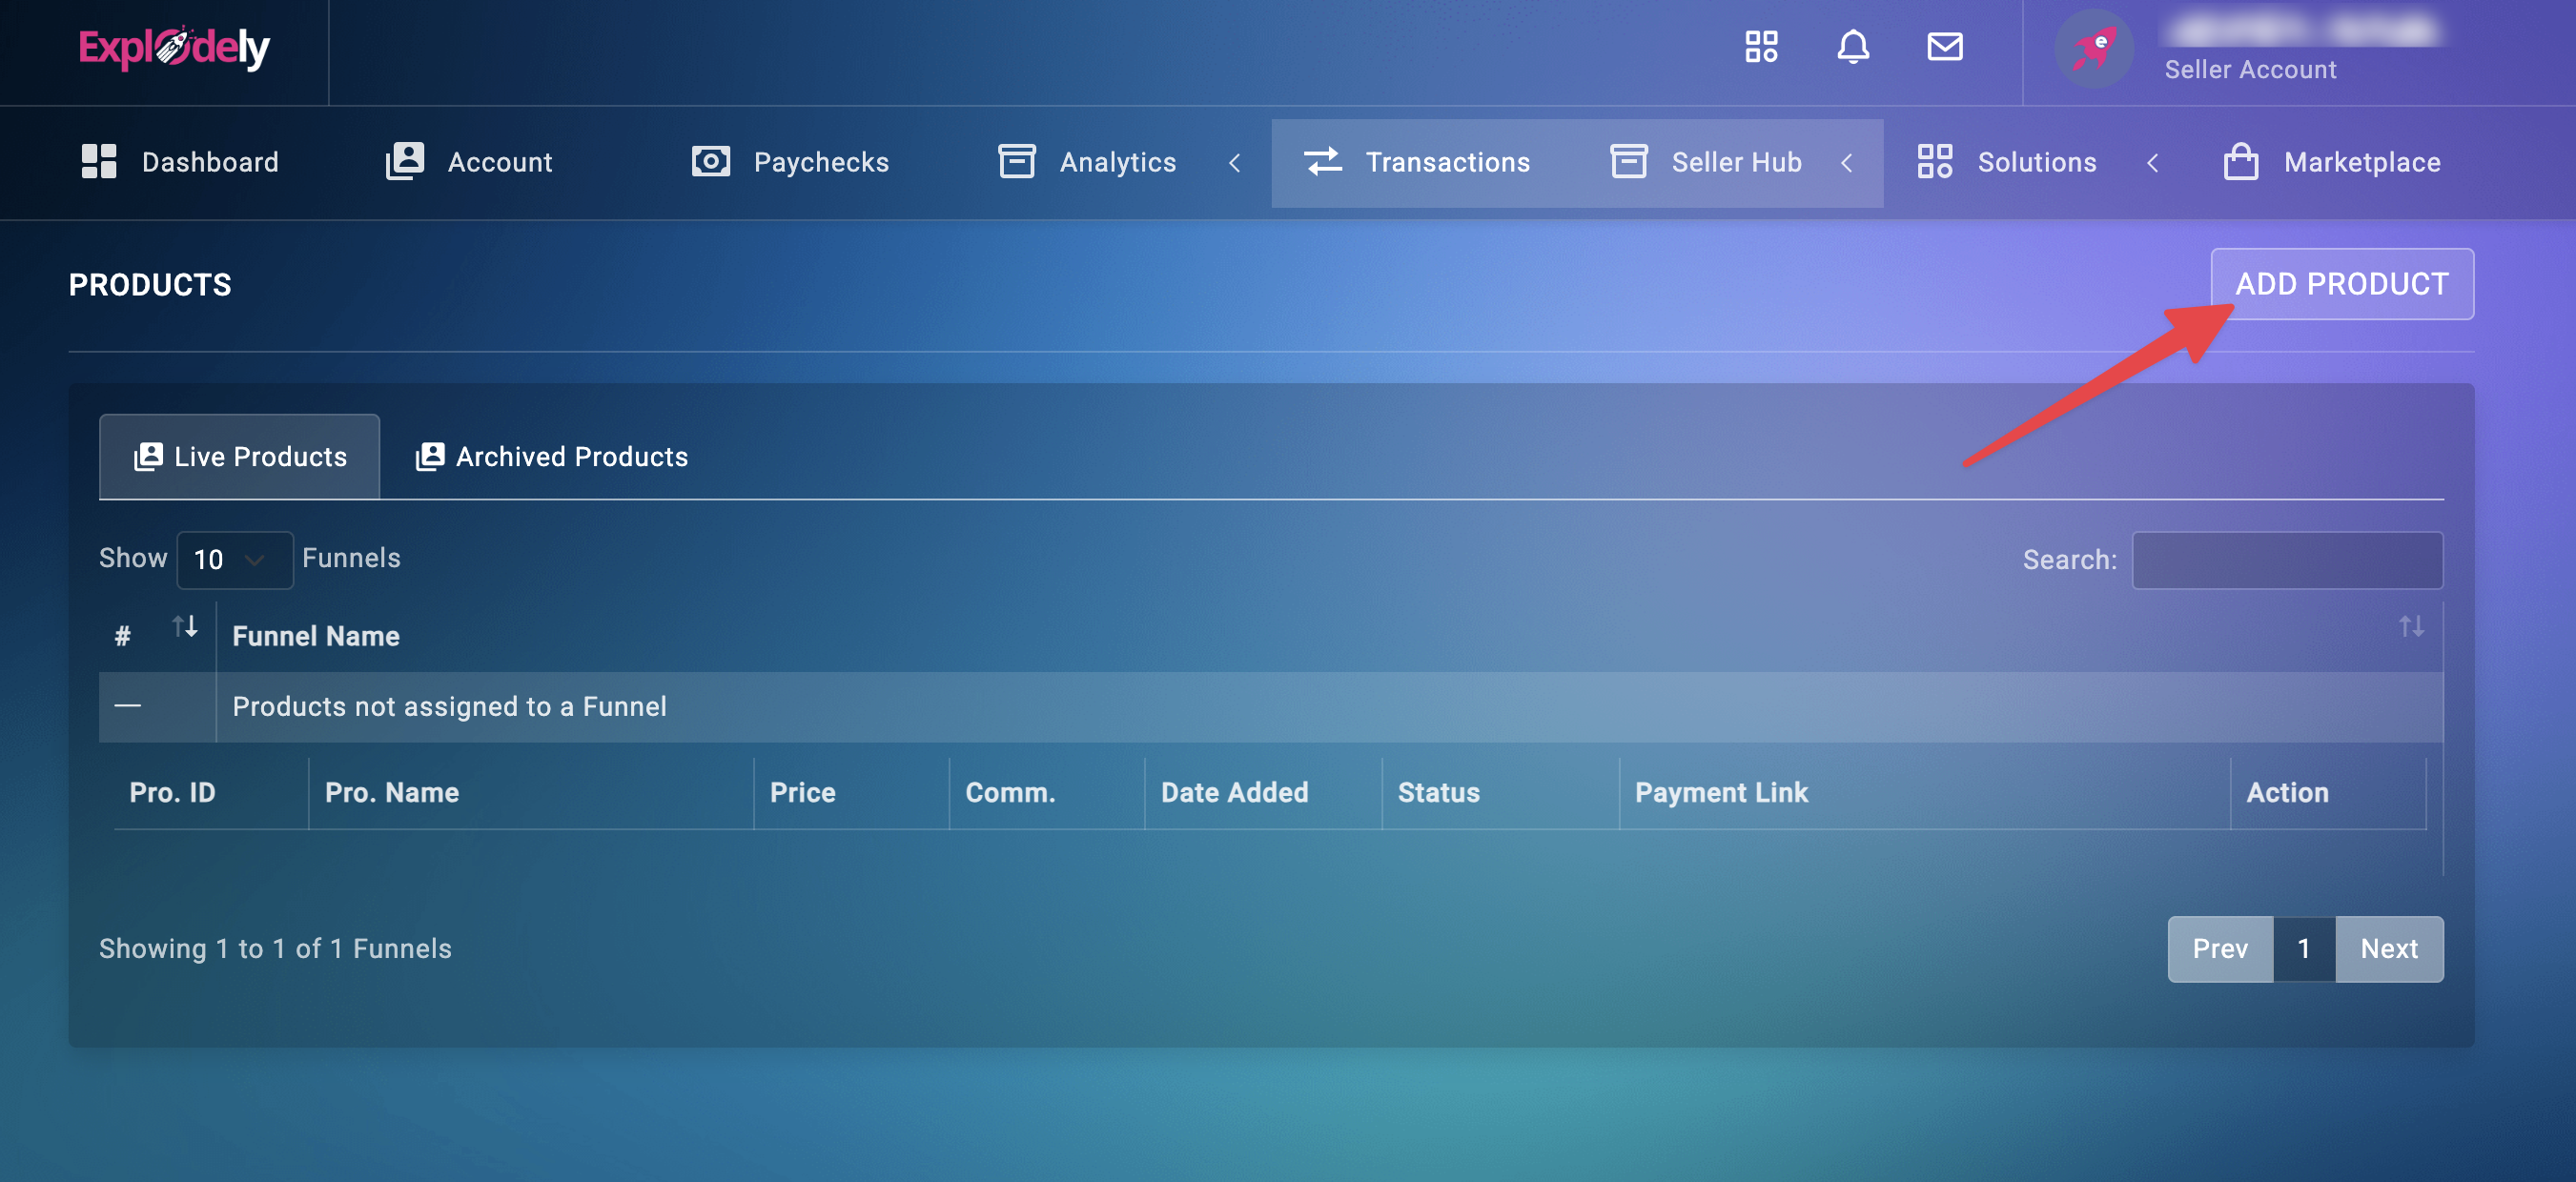
Step 2: In your account, Click on Products under the header Seller Hub.
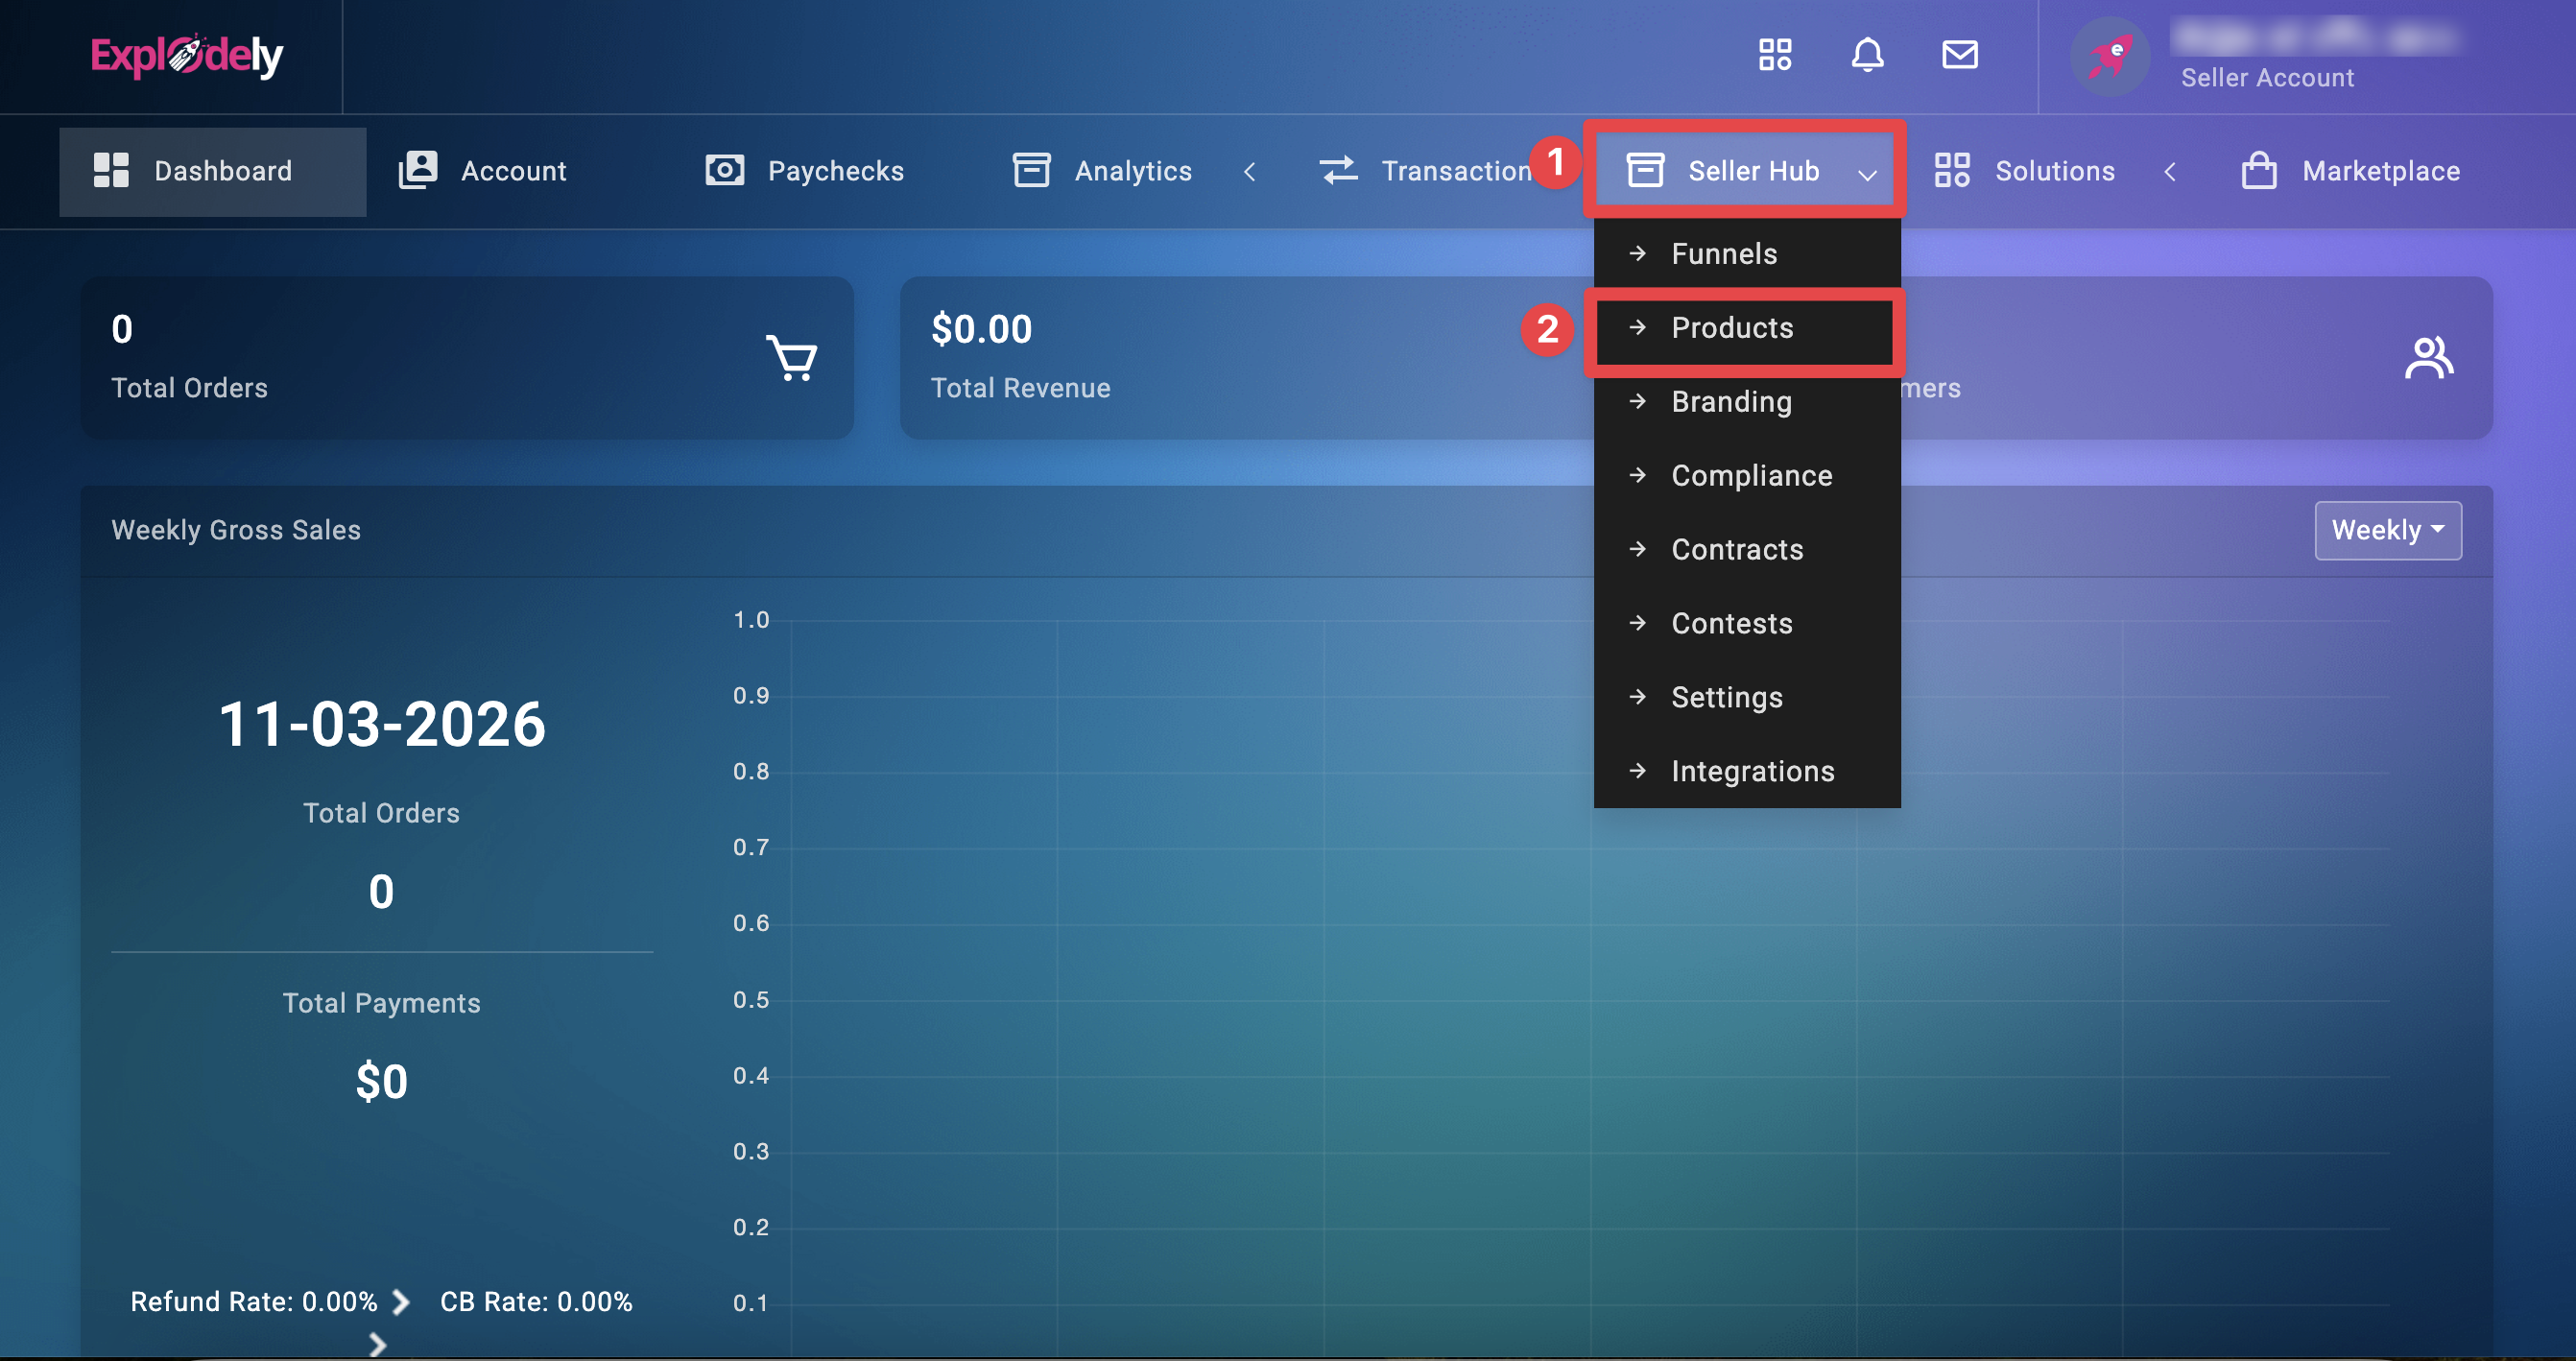
Then click on Add Product and the steps to add products will become available.
I
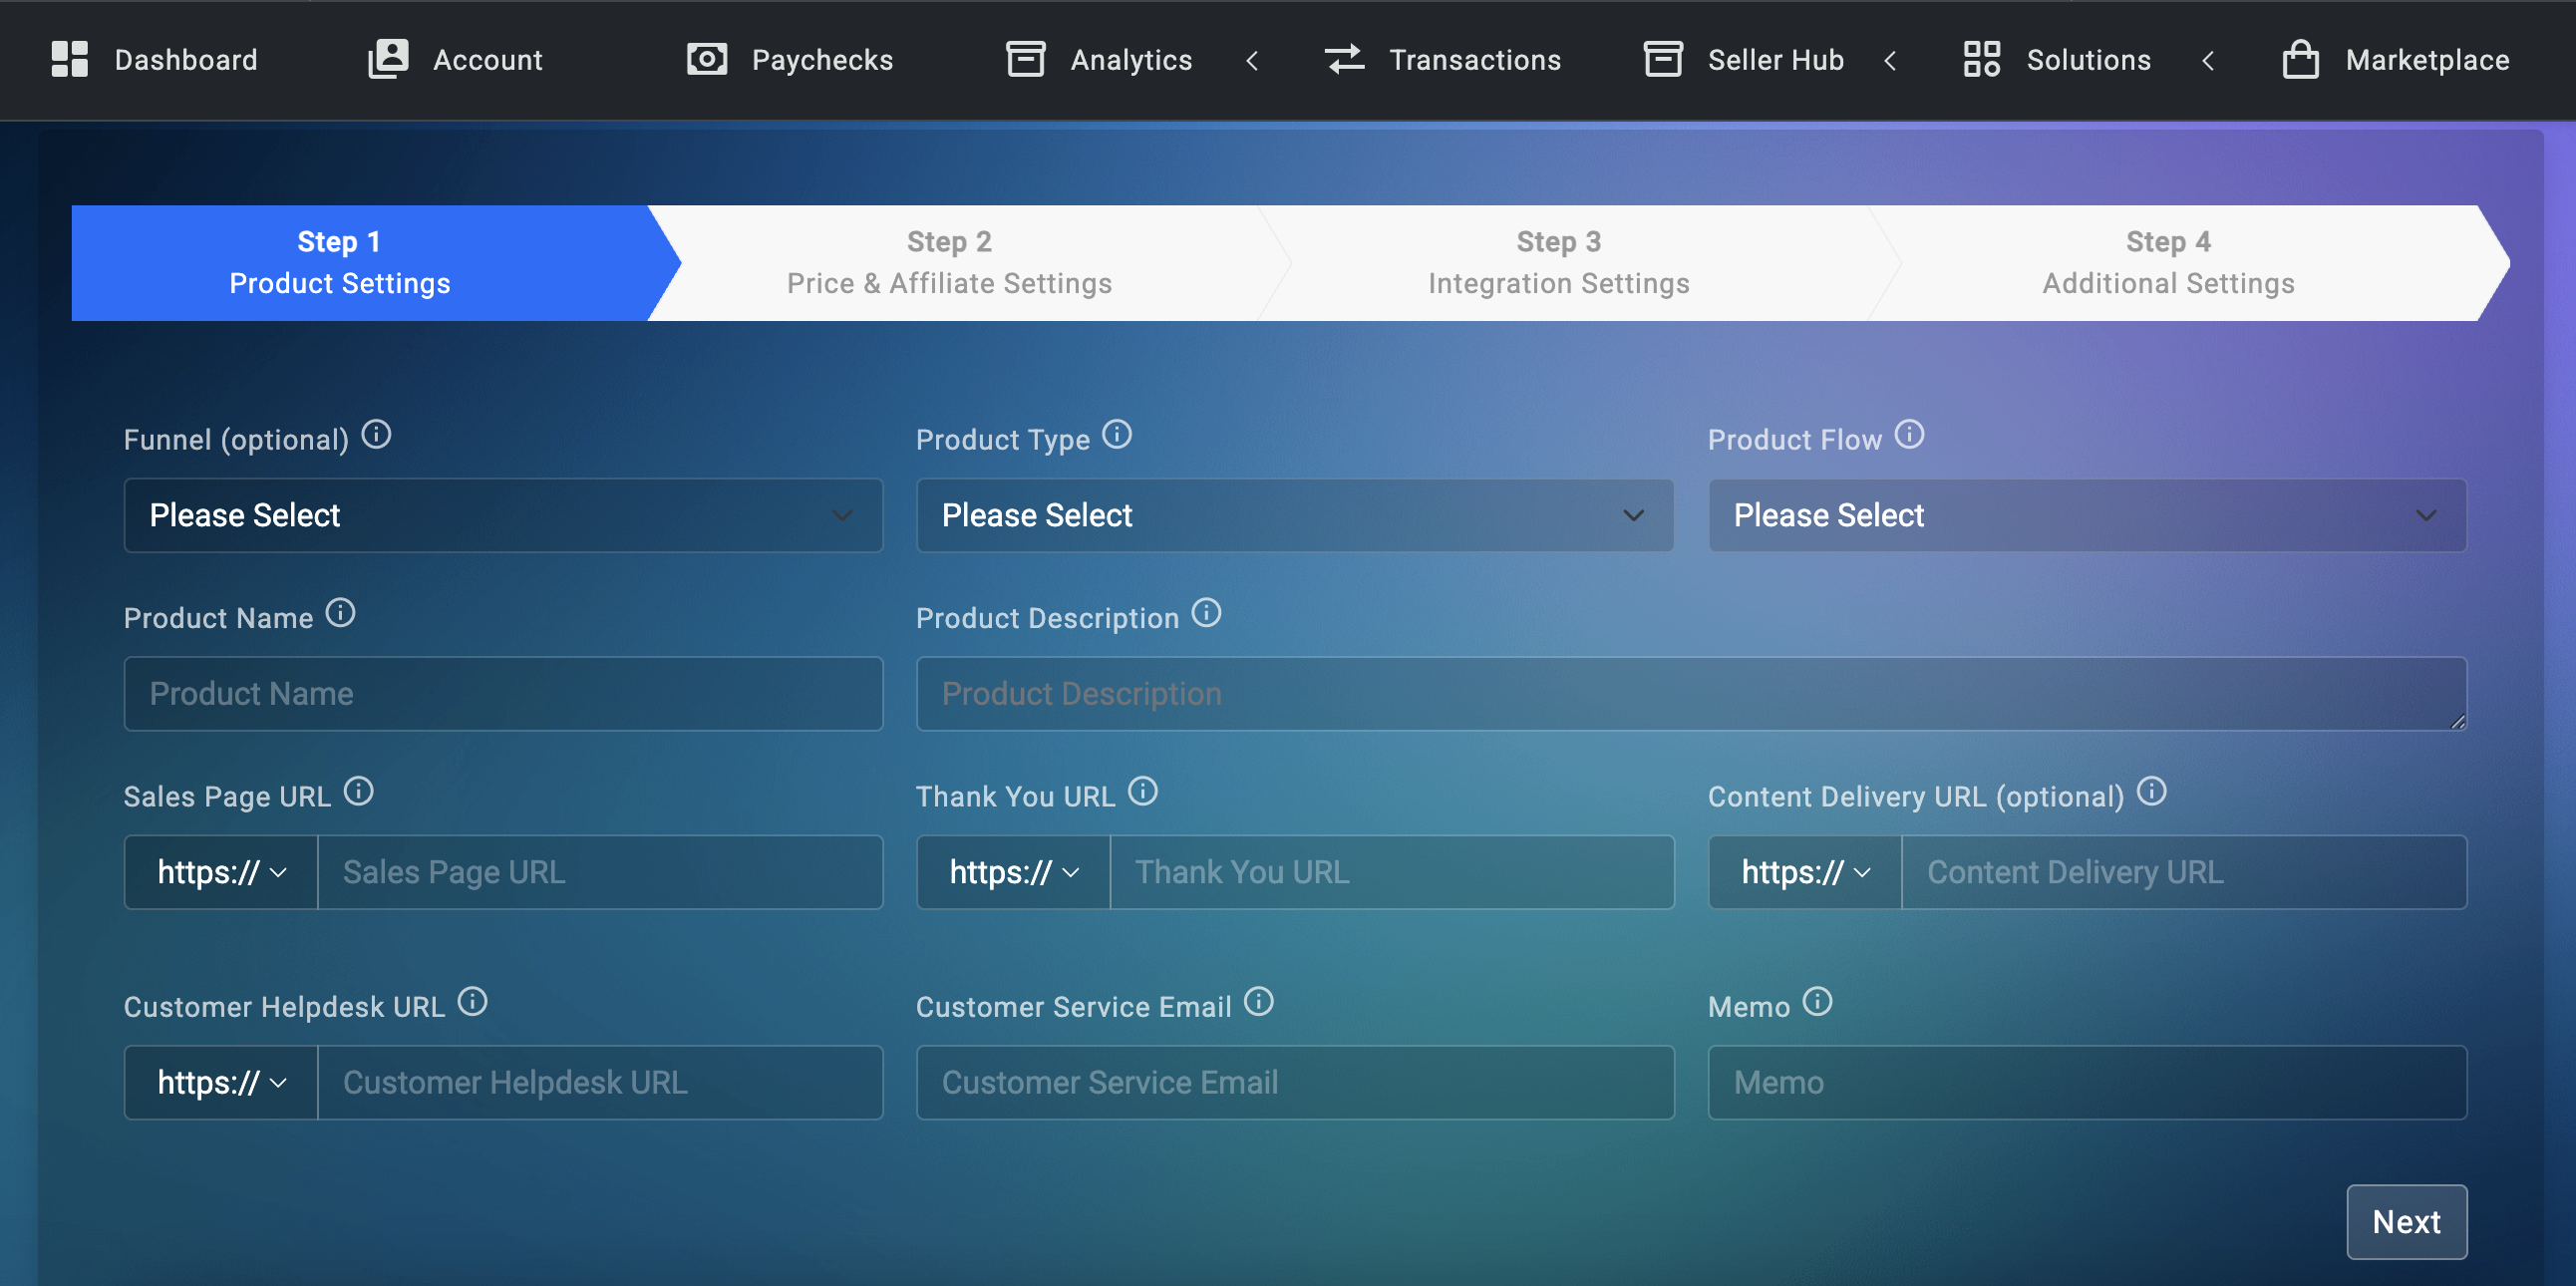
Product Settings
Step 3: Select the Funnel from the dropdown list and then the type of product (Digital or Physical) you want to add and the product flow (Front End, Upsell or Downsell) from the Product Type and Product Flow dropdown lists.
Step 4: Enter your product Name and Description along with the Sales page, Thank you page, Content Delivery URL, Customer Helpdesk URL and Customer Service Email links in the respective fields and click Next.
Read our article Content Deliver URL to learn more about our Content Delivery URL feature.
II
Price & Affiliate Settings
Step 5: Select the Payment Type (Straight Sale, Rebill/Payment Plan or Trial).
- For the Straight Sale, simply enter the Product Price and Affiliate Commission Type and Value.
- If you chose the Rebill/Payment plan, you would be required to provide additional details like Initial Rebill Price, Subsequent Rebill Price, Rebill Period (Frequency), Total number of Rebills and affiliate commissions on Initial and Subsequent rebills.
- In the case of Trial, you would be required to provide additional details like Trial Price, Trial Period, Rebill Price, Rebill Period, Total Rebills, Trial Commission Type and Value and Rebill Commission%.
You can also change the price of your product later. Please refer to the article: How can I change the price of my product? for details.
Step 6: Select Marketplace Visibility Type (Public or Private) from the dropdown list and provide additional details based on your selection. Click Next when done.

III
Integration Settings
Step 7: In this section, you can add Email Integrations, Webinar Integrations, Membership Services Integrations, Product IPN and FB Pixel to your product. For a detailed explanation of our integration feature, please refer to the Integrations articles section in our knowlegdebase.

IV
Additional Settings & Features
Step 8: In this section, you can add additional features like Exit Intent, which prompts visitors to complete the checkout form when they become inactive or attempt to leave the page.
You can also choose to add Order Bump, Coupons and Alternate Pricing. All these features are free.
Please check these articles for details about these additional features:
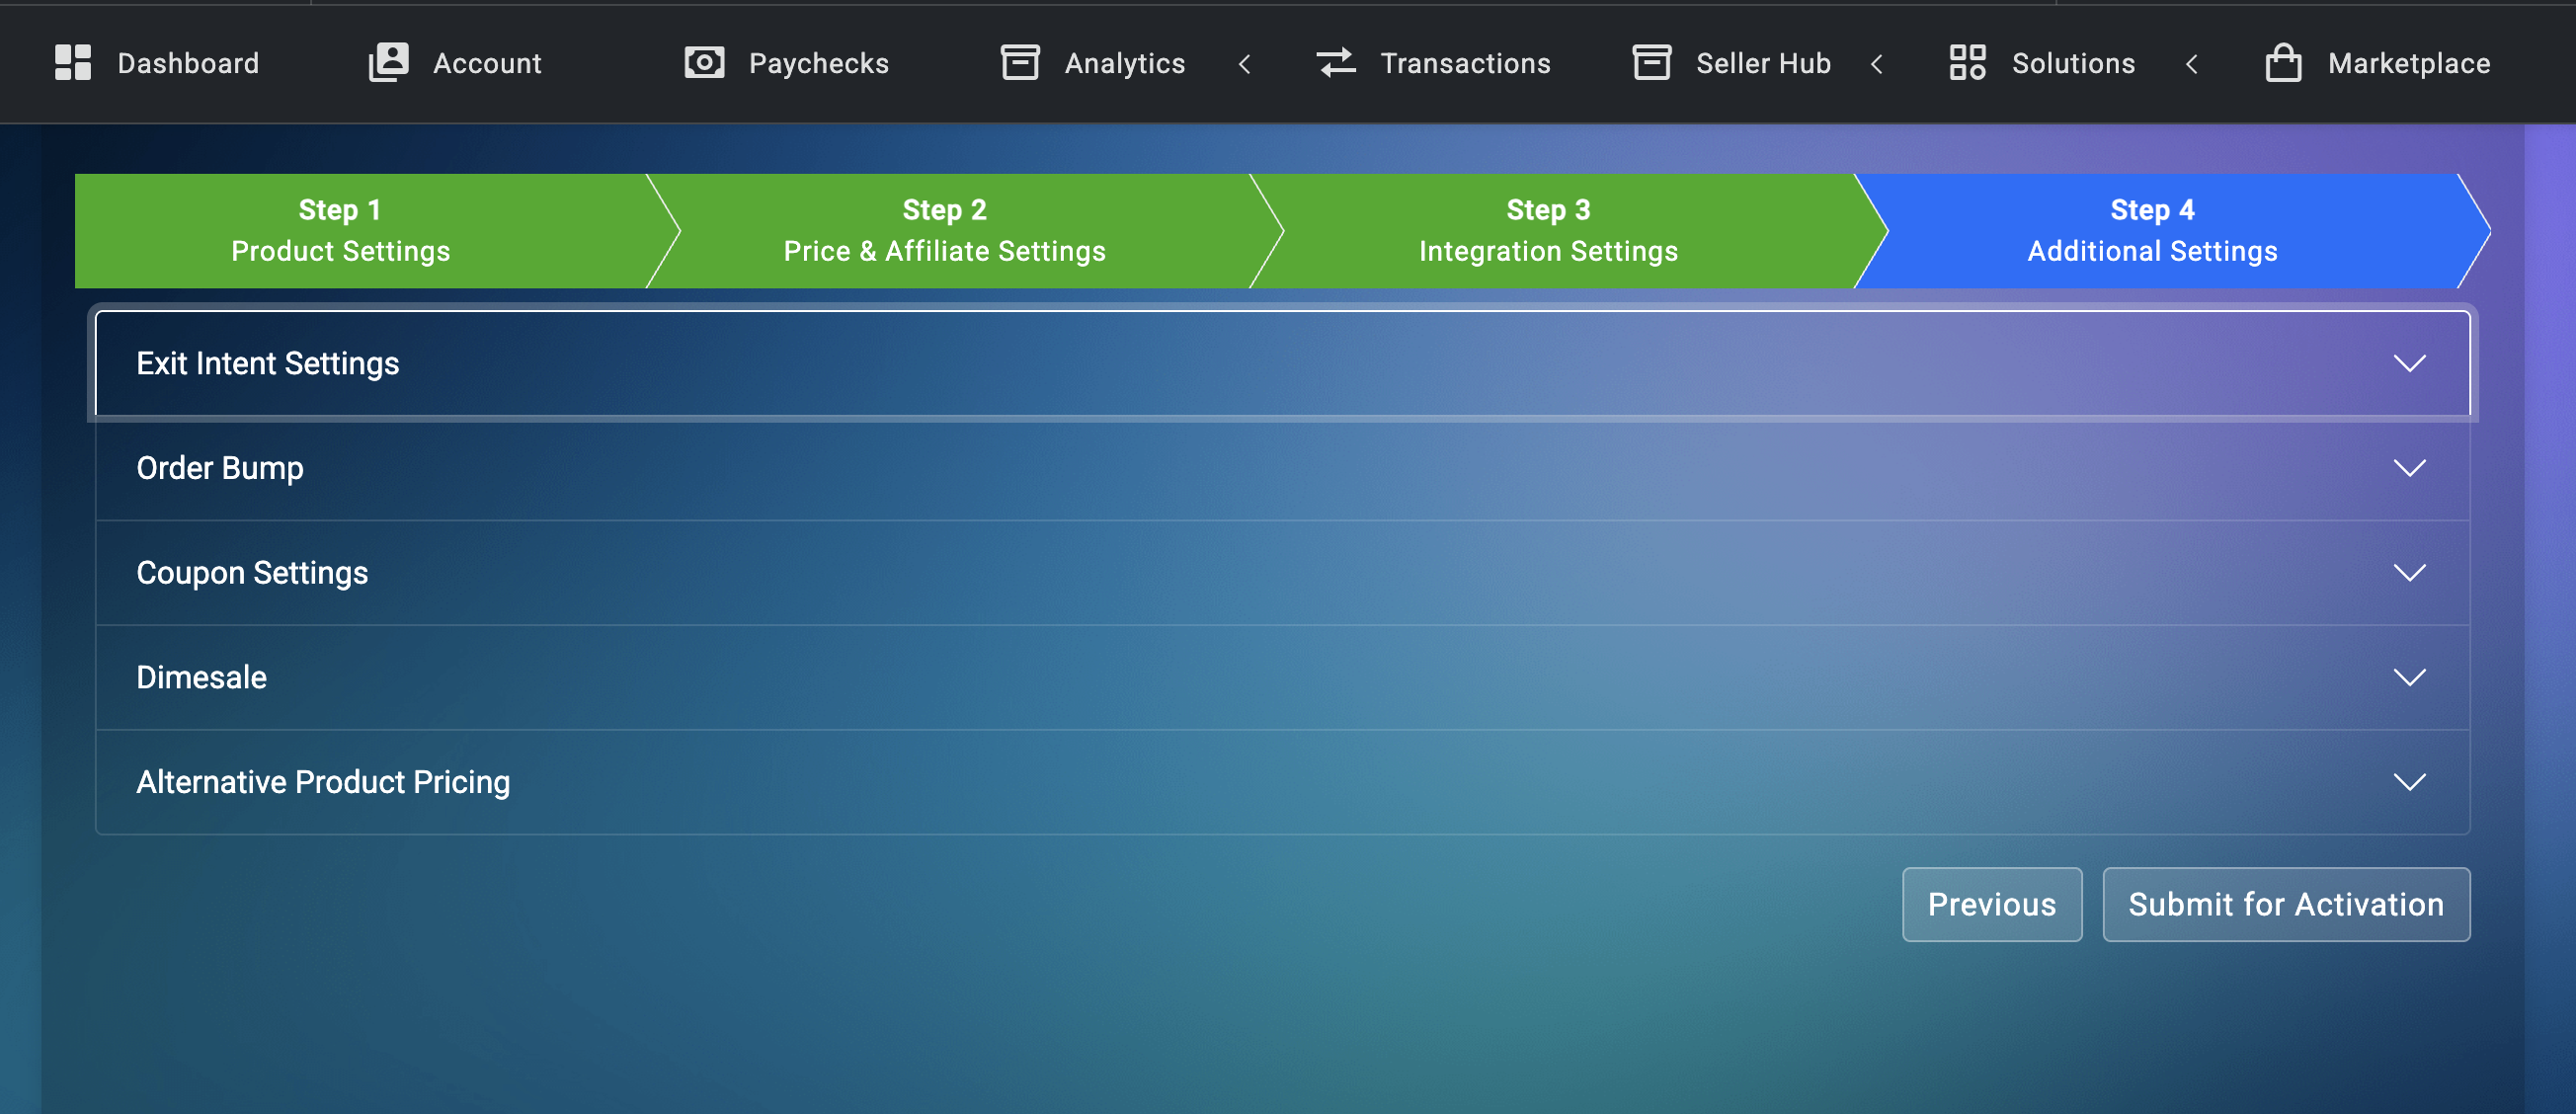
Once you are done, click on Submit Changes.
If you have a funnel setup, you can repeat the steps mentioned above to add more products to your account.
Once your product is submitted, the compliance review will be done within 3-5 business days. You will get an email notification when your product is approved. After your product is approved, you can start selling!
Please refer to our article Explodely Compliance For Sellers to learn more about our Compliance requirements on your Sales page and Thank you page.
Please contact us if you have any questions or concerns at sellers@explodely.com.